Difficulty:

Easy - medium
You will need:
- A 2.5mm crochet hook
- A 2mm crochet hook
- dk yarn in dark brown and tan
- 4ply yarn in light blue, lilac, and black
- A scrap of white and black embroidery thread
- Toy stuffing
- A darning needle
- An embroidery needle
- A reel of colourless plasticy thread (you should be able to buy this from craft shops)
For the otters (make one large and one small):
Use a 2.5mm hook and brown dk yarn unless otherwise specified
For the body:
With a 2.5mm hook and brown dk yarn ch5Round 1: sc int eh 2nd chain st from hook, then sc in each of the next 2 chain sts. Make 3sc in the next chain st (the first one you made), then sc into the back of the previous 2 chain sts you crocheted into in turn. Finally make 2sc into the back of the first chain st you crocheted into (10sc)
Round 2: make 2sc int eh first st, sc2, make 2sc in each of the next 3sts, sc2, then make 2sc into each of the last 2sts (16sc)
Round 3: sc, make 2sc in the next st, sc2, (sc, make 2sc in the following st) 3 times, sc2, (sc, make 2sc in the next st) twice (22sc)
Round 4: sc2, make 2sc in the next st, sc2, (sc2, make 2sc in the following st) 3 times, sc2, (sc2, make 2sc in the next st) twice (28sc)
Rounds 5 - 20: (16 rounds) sc in each st
Note: for the larger otter you should add 4 more rounds here
Round 21: Sc5, sc2tog, sc, sc2tog, sc, sc2tog, sc6, make 2sc in the next st, sc2, make 2sc in the following st, sc2, make 2sc in the next st, sc2 (28sc)
Round 22: Sc2, sc2tog, sc5, sc2tog, sc7, make 2sc in the next st, sc4, make 2sc in the following st, sc4 (28sc)
Round 23: Sc2, sc2tog, sc2, sc2tog, sc2, sc2tog, sc16 (25sc)
Round 24: Sc2, sc2tog, sc2, sc2tog, sc17 (23sc)
Round 25: Sc2, sc2tog, sc, sc2tog, sc16 (21sc)
Round 26: Sc in each st
Round 27: Slip6, sc4, hdc7, sc4
Round 28: Sc, slip6, sc4, hdc7, sc3
Rounds 29 - 30: (2 rounds) Slip8, sc3, hdc7, sc3
Round 31: Slip8, sc3tog, hdc7, sc3tog (17sc)
Round 32: (More than one round) Slip8, sc2tog, hdc6, sc2tog
Rounds 33 - 34: (2 rounds) Sc in each st
Round 35: Sc2tog, sc5, sc2tog, sc, hdc6 (15sc)
Round 36: (slightly less than 1 round) Sc3, sc2tog, sc3, sc2tog 3 times (11sc)
Stuff firmly
Round 37: Sc2tog 5 times (6sc)
Round 38: Sc in each st
Fasten off
For the tail:
Ch12
Round 37: Sc2tog 5 times (6sc)
Round 38: Sc in each st
Fasten off
For the tail:
Ch12
Round 1: sc in the first chain st you made, then sc in every following chain st to make a loop (12sc)
Round 2: sc in each st
Round 3: Sc2tog, sc10 (11sc)
Round 4: Sc in each st
Round 5: Sc4, sc2tog, sc5 (10sc)
Rounds 6 - 8: (3 rounds) Sc in each st
Round 9: Sc4, sc2tog, sc4 (9sc)
Rounds 10 - 11: (2 rounds) Sc in each st
Round 12: Sc2tog, sc7 (8sc)
Rounds 13 - 14: (2 rounds) sc in each st
Round 15: Sc2tog, sc6 (7sc)
Round 16: Sc in each st
Round 17: Sc2tog, sc5 (6sc)
Round 18: Sc2, sc2tog, sc2 (5sc)
Rounds 19 - 20: (2 rounds) sc in each st
Round 21: Sc2tog, sc3 (4sc)
Round 22: Hdc, dc
Fasten off
Stuff firmly and sew to the body

For the legs (make 2):
Make a magic loop with 6sc
Round 1: make 2sc in each st (12sc)
Rounds 2 - 5: (4 rounds) sc in each st
Round 6: Sc2tog 4 times, sc4 (8sc)
Fasten off
Press flat
For the feet (make 2):
Make a magic loop with 6sc
Round 1 - 2: (2 rounds) sc in each st
Round 3: make 2sc in the first st, sc2, make 2sc in the next st, sc2 (8sc)
change to a 2mm hook
Round 4: sc3, ch1
Round 5: sc in each of these 4 sts (including the chain st)
Fasten off
Rejoin yarn to the next st of round 3.
Round 4: sc in this st, ch1, skip3, sc, ch1 (4sts)
Round 5: sc in each of these last 4sts you made (including chain sts)
Fasten off
Rejoin yarn to the next st of round 3
Round 4: Sc in this st and the next 2 sts. ch1
Round 5: sc in each of these last 4sts
Fasten off
Sew these to the bottoms of the legs, then sew the legs to the side of the otter.
For the ears (make 2):
Make a magic loop with 6sc
Make a magic loop with 6sc
Round 1: sc in each st
Fasten off
Sew these to the sides of the head
For the front section:
with a 2.5mm hook and tan dk yarn ch3
Row 1: sc in the 2nd chain sts from hook, then sc in the following chain st. ch1, turn (2sc)
Row 2: make 2sc in each st. ch1, turn (4sc)
Row 3: make 2sc in the first st, sc3. ch1, turn (5sc)
Row 4: make 2sc in the first st, sc4. ch1, turn (6sc)
Row 5: sc in each st. ch1, turn
Row 6: sc5, make 2sc in the next st. ch1, turn (7sc)
Rows 7 - 11: (5 rows) sc in each st. ch1, turn
Row 12: sc3, sc2tog, sc2. ch1, turn (6sc)
Rows 13 - 22: (10 rows) sc in each st. ch1, turn
Row 23: sc2tog, sc2, sc2tog. ch1, turn (4sc)
Row 24: sc in each st. ch1, turn
Row 25: sc2tog twice. ch1, turn (2sc)
Row 26: sc in each st
Fasten off
Sew this to the front of your otter
For the arms:
With brown yarn make a magic loop with 6sc
Rounds 1 - 7: (7 rounds) sc in each st
change to a 2mm hook
Row 8: sc in the first st. ch1, turn
Row 9: sc in this st, ch1, turn
Row 10: sc in this st
Fasten off
Rejoin yarn to the next st of round 7
Row 8: sc in the next st of round 7 and the previous st before the last finger you made simultaneously. ch1, turn
Note: if you are unsure of what I mean, just crochet into the next st of round 7, and then sew the hand closed once you've finished with the fingers (this goes for the next finger you will make as well)
Row 9: sc in this st. ch1, turn
Row 10: sc in this st
Fasten off
Rejoin yarn to the next st of round 7
Row 8: sc in the next st of round 7 and the previous st before the last finger you made simultaneously. ch1, turn
Row 9: sc in this st. ch1, turn
Row 10: sc in this st
Fasten off
Rejoin yarn to the next st of round 7
Row 8: sc in the next st of round 7 (if you have been crocheting through both sts simultaneously this will be the only stitch left of this round)
Row 9: sc in this st. ch1, turn
Row 10: sc in this st
Fasten off
Flatten these slightly and sew to the sides of the otter
For the facial features:
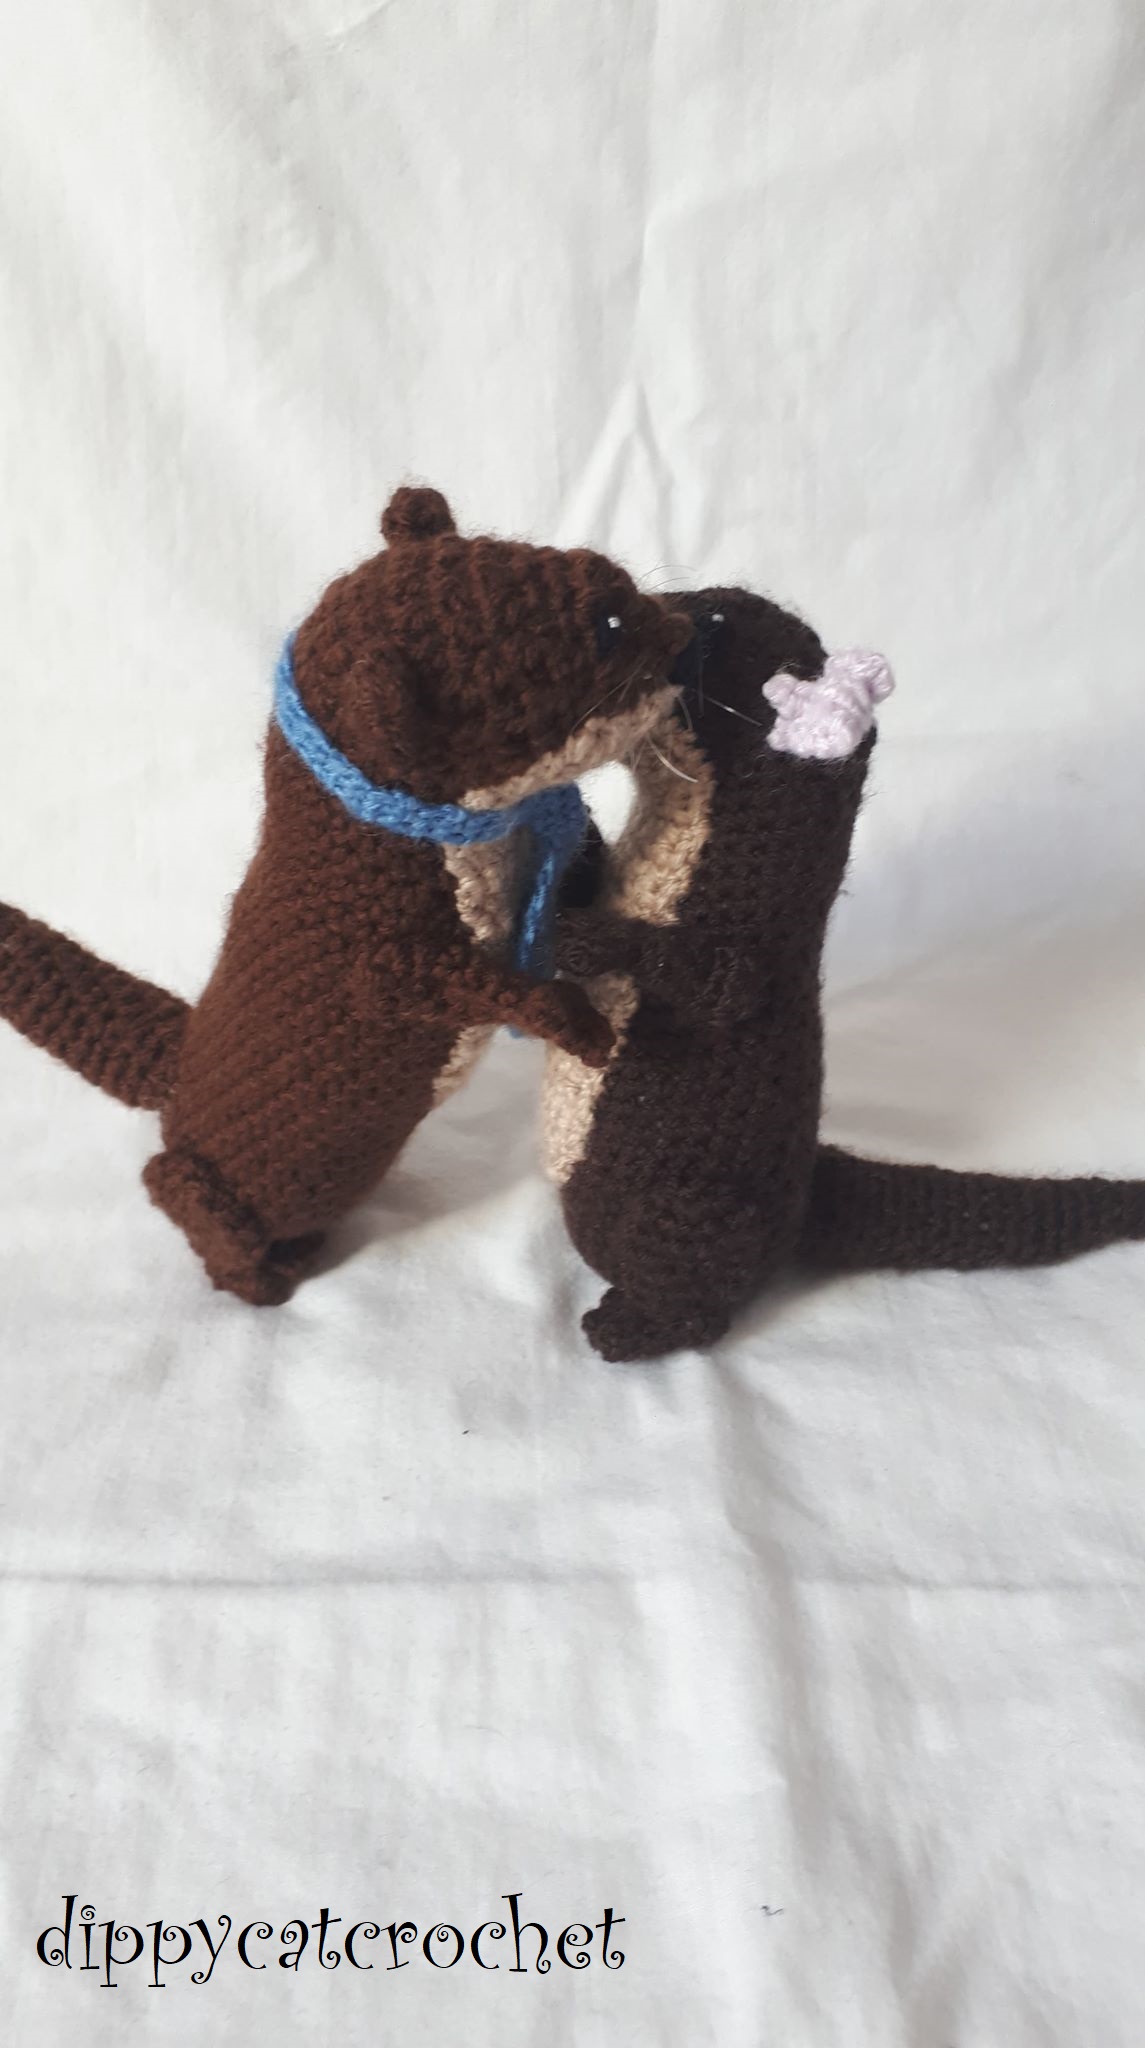
Embroider the arms in place with black yarn, then add highlights using white embroidery thread.
Embroider the nose using black yarn, then add the mouth using black embroidery thread.
Finally sew the whiskers in place either side of the nose using the plasticy thread. For each whisker you will need to secure the thread using a few small stitches, then trim it to a length of 1-2cm (alternatively you can make 2 whiskers at the same time if you leave a loose end free and trim it to the same length as te end)

For the tie:
With a 2mm crochet hook and blue 4ply yarn make a magic loop with 1sc. ch1, turn
Row 2: make 3sc in this st. ch1, turn (3sc)
Row 3: make 2sc in the first st, sc, make 2sc in the last st. ch1, turn (5sc)
Row 4: make 2sc in the first st, sc3, make 2sc in the last st. ch1, turn (7sc)
Row 5: make 2sc in the first st, sc5, make 2sc in the last st. ch1, turn (9sc)
Row 6: sc3, sc2tog, sc4 ch1, turn (8sc)
Row 7: sc in each st. ch1, turn
Row 8: sc3, sc2tog, sc3. ch1, turn (7sc)
Row 9: sc in each st. ch1, turn
Row 10: sc2, sc2tog, sc3. ch1, turn (6sc)
Row 11: sc in each st. ch1, turn
Row 12: sc2, sc2tog, sc2. ch1, turn (5sc)
Row 13: sc in each st. ch1, turn
Row 14: sc, sc2tog, sc2. ch1, turn (4sc)
Row 15: sc in each st. ch1, turn
Row 16: sc, sc2tog, sc. ch1, turn (3sc)
Row 17: sc in each st. ch1, turn
Row 19: sc2tog, sc. ch1, turn
Rows 20 - 62: (43 rows) sc in each st. ch1, turn
Row 63: Sc in each st
Fasten off
Wind this around the larger otter's neck, wrapping the shorter end around the longer end twice so that it resembles a tie. Sew this in place.

For the bow:
With a 2mm hook and lilac 4ply yarn make a magic loop with 1sc. ch1, turn
Row 1: make 3sc in this st. ch1, turn (3sc)
Row 2: sc in each st. ch1, turn
Row 3: sc3tog. ch1, turn (1sc)
Rows 4 - 5: (2 rows) sc in each st. ch1, turn
Row 6: make 3sc in this st. ch1, turn (3sc)
Row 7: sc in each st
Row 8: sc3tog
Fasten off
Sew the ends of this section together, then sew these to the centre of the bow, flattening it into place
For the ribbons:
Make a magic loop with 1sc. ch1, turn
Rows 1 - 8: (8 rows) sc in this st. ch1, turn
Row 9: sc in this st
Fasten off
Wrap this section around the middle of the bow, so that they hang down slightly below, then sew in place.


Sew the bow to the ear of the smaller otter.

That's all from this pattern - I hope you have enjoyed it! If you have any questions about this or any of my other patterns please don't hesitate to contact me, either by leaving a comment below, or via my Ravelry or Instagram
pages. My Instagram page is also a good place to follow to find out about the projects are working on and be alerted as to when I post a new pattern.
You are very welcome to sell finished products, but I do ask that you don't re-post this pattern or claim it as your own. Thank you!!!