


This merman is based on the 'Roweena the raggedy rascal of the sea' pattern made by Sharon Maher which can be found here
I have made the tail detachable and made it more masculine (and added a shirt). It is also slightly smaller dues to the size of hook used.
You will need:
- a 2.5mm crochet hook (use this when the hook size isn't specified)
- dk yarn in skin colour (use this when the yarn colour isn't specified) and a colour for the tail (the yarn I used was a variety of greeny-blue colours)
- a 2mm crochet hook
- a 1.5mm crochet hook
- 4ply yarn in light green and light blue
- toy stuffing
- a darning needle
- an embroidery needle
- Embroidery thread in black, green, and white
- a rectangle of fabric approx 45 x 25 cm for the hair.
- Scissors
Difficulty:

Easy - medium
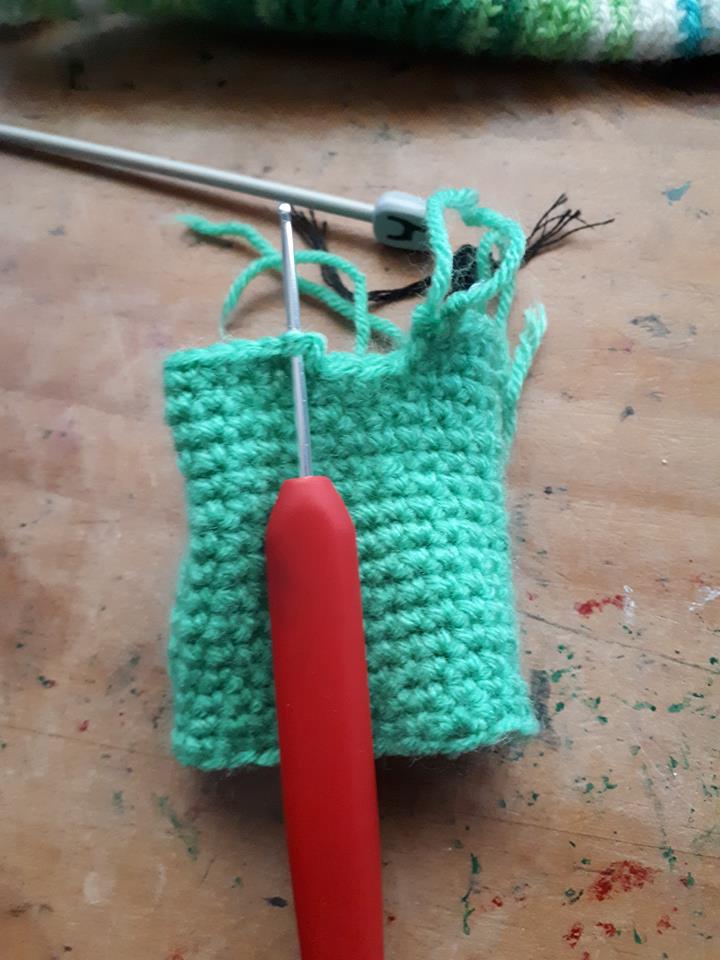
For the body (starting from the base):
Make a magic loop with 6sc
Round 1: 2sc in each st (12sc)
Round 2: sc in the first st, 2sc in the next st, rep to end (18sc)
Round 3: sc in the first 2 sts, 2sc in the next st, rep to end (24sc)
Rounds 4 - 5: (2 rounds) sc in each st
Round 6: sc in the first 2 sts, sc2tog, rep to end (18sc)
Rounds 7 - 11: (6 rounds) sc in each st
Round 12: 2sc in the first st, sc in the next 4sts, 2sc in the following st, sc in the last 12sts (20sc)
Round 13: sc in each st
Round 14: Sc in the first 2sts, 2sc in the next st, sc in the next 5sts, 2sc in the following st, sc in the last 11sts (22sc)
Rounds 15 - 16: (2 rounds) sc in each st
Note: these next 2 rounds are both slightly less than 1 round
Stuff the body you have made so far
Round 17: Sc3tog, sc in the next 8sts, sc3tog, sc in the next 7sts
Round 18: Sc4tog, sc in the next 5sts, sc4tog, sc in the next 4sts (12sc)
Round 19: Sc in the first 2sts, sc2tog, rep 3 times to end (9sc)
Fasten off
Stuff the body you have made so far
Round 17: Sc3tog, sc in the next 8sts, sc3tog, sc in the next 7sts
Round 18: Sc4tog, sc in the next 5sts, sc4tog, sc in the next 4sts (12sc)
Round 19: Sc in the first 2sts, sc2tog, rep 3 times to end (9sc)
Fasten off
For the legs (make 2):
Make a magic loop with 7sc
Rounds 1 - 3: (3 rounds) sc in each st
Round 4: 3sc in the first st, sc in the next st, slip the following 4sts, sc in the last st
Round 5: Sc3tog, sc in the next 2sts, slip the next 2sts, sc in the last 2sts
Make a magic loop with 7sc
Rounds 1 - 3: (3 rounds) sc in each st
Round 4: 3sc in the first st, sc in the next st, slip the following 4sts, sc in the last st
Round 5: Sc3tog, sc in the next 2sts, slip the next 2sts, sc in the last 2sts
Rounds 6 - 26: (21 rounds) sc in each st
Fasten off
Sew these legs to the base of the body

For the tail:
With green/ blue yarn make a magic loop with 8sc
Round 1: sc in each st
Round 2: sc in the first st, 2sc in the next st, rep to end (12sc)
Rounds 3 - 5: (3 rounds) sc in each st
Round 6: sc in the first 2sts, 2sc in the next st, rep to end (16sc)
Rounds 7 - 9: (3 rounds) sc in each st
Round 10: sc in the first 3sts, 2sc in the next st, rep to end (20sc)
Rounds 11 - 13: (3 rounds) sc in each st
Round 14: sc in the first 4sts, 2sc in the next st, rep to end (24sc)
Rounds 15 - 17: (2 rounds) sc in each st
Round 18: sc in the first 5sts, 2sc in the next st, rep to end (28sc)
Rounds 19 - 21: (3 rounds) sc in each st
Round 22: sc in the first 6sts, 2sc in the next st, rep to end (32sc)
Rounds 23 - 40: (18 rounds) sc in each st
Round 41: sc in the first 2sts, sc2tog, rep to end (24sc)
Round 42: sc in each st
Fasten off
For the curlicues (wavy end bits)(make 1 of each length):
Note - these are directly inspired by those added to the 'Rowena the raggedy rascal of the sea' pattern linked above
ch25
Row 1: 2sc in the 2nd chain st from hook, 2sc in every following chain st to end
Fasten off
ch30
Row 1: 2sc in the 2nd chain st from hook, 2sc in every following chain st to end
Fasten off
ch35
Row 1: 2sc in the 2nd chain st from hook, 2sc in every following chain st to end
Fasten off
ch40
Row 1: 2sc in the 2nd chain st from hook, 2sc in every following chain st to end
Fasten off
ch45
Row 1: 2sc in the 2nd chain st from hook, 2sc in every following chain st to end
Fasten off

This tail should be able to be slipped onto the body over the legs
For the head:
Make a magic loop with 6sc
Round 1: 2sc in each st (12sc)
Round 2: sc in the first st, 2sc in the next st, rep to end (18sc)
Round 3: sc in the first 2sts, 2sc in the next st, rep to end (24sc)
Rounds 4 - 11: (8 rows) sc in each st
(The next few rounds are all slightly less than 1 round (except round 13))
Round 12: sc3tog, sc in the next 9sts, sc3tog, sc in the next 8sts(20sc)
Round 13: Sc3tog, sc in the next 7sts, sc3tog, sc in the next 7sts(16sc)
Stuff
Round 14: Sc3tog, sc in the next 5sts, sc3tog, sc in the next 4sts(12sc)
Round 15: Sc2tog 6 times to end (6sc)
Fasten off
Round 13: Sc3tog, sc in the next 7sts, sc3tog, sc in the next 7sts(16sc)
Stuff
Round 14: Sc3tog, sc in the next 5sts, sc3tog, sc in the next 4sts(12sc)
Round 15: Sc2tog 6 times to end (6sc)
Fasten off
For the arms (make 2):
Make a magic loop with 5sc
Round 1 - 18: (18 rounds) sc in each st
Make a magic loop with 5sc
Round 1 - 18: (18 rounds) sc in each st
Fasten off
Fasten off
Fasten off
For the hair:
Tear approximately 22 strips of fabric, each around 1.5 cm wide and 25 cm long. (make sure you leave a section of fabric approx. 10cm x 25cm for the beard) After you've done that, tear each strip in half length-ways, so you have twice as many 0.75 cm wide strips.
To tear the strips make a small cut in one end of the fabric first, then pull the two sides apart, so that it tears in half lengthways.
To tear the strips make a small cut in one end of the fabric first, then pull the two sides apart, so that it tears in half lengthways.
Attach these strips to the head the same way as you would attach amigurumi hair if you were doing it with yarn, as detailed below:
Bring your hook through a loop of the head, fold the yarn in half and pull the looped end through the head with your hook, then thread the un-looped ends of your yarn through the loop you pulled through. Tighten this, and repeat this process all over the head.
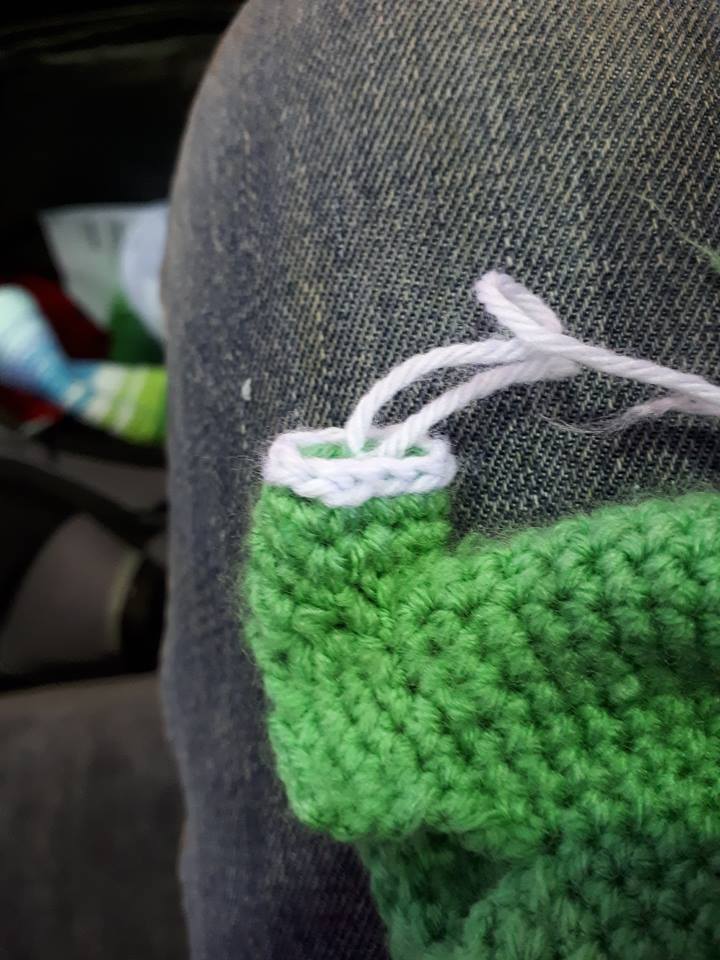
For the shirt:
With 4ply yarn and a 2mm crochet hook ch29
Round 1: sc in the first chain st you made, then sc in every following chain st to make a loop (29 sc)
Rounds 2 - 14 : (13 rounds) sc in each st
Round 15: Sc in the first 5sts. Fasten off
Fasten on yarn to the same st, and sc in that same st. Sc in the next 5sts. Fasten off
rejoin yarn to the 3rd st from where you fastened off. Sc in this st and the next 13sts. Fasten off.
Round 16: rejoin to the 3rd st from where you fastened off. Sc in this st and the next 3, sc2tog.
Fasten off
Fasten on to the next st (the st you made on the last round when you fastened off and the crocheted
into the same st). sc2tog between this st and the next st, then sc in the next 4 sts. Fasten off
rejoin yarn to the first st of the next section (the section you started after skipping two stitches when you did the last row) (as shown below)

Sc in this st and the next 5 sts, sc2tog, sc in the next 6sts. Fasten off
Rounds 17 - 18: (2 rows) rejoin yarn to the first st of the next section, as you did before.
sc in this st and the next 4sts. Fasten off
Rejoin yarn to the first st of the next section. Sc in this st and the next 4sts. Fasten off
Rejoin yarn to the first st of the next section. Sc in this st and the next 12sts
Round 18.5: (this is just a little bit that comes between rows 18 and 19 to form the armholes)
ch2, slip the fisrt st of the next section, Fasten off.
Fasten on to the last st of the next section, ch2, slip the first st of the next section. Fasten off.
Round 19: Rejoin yarn to the first st after the middle gap at the front of the shirt (the v- bit in between the armholes) (as shown below)

I found it helpful to sew in all the loose ends at this point so that it was easier to see what I was doing.

Sc in this st and the next 3sts
Sc2tog between this next st and the first chain st above the armhole, sc2tog between the next chain
st and the following st, sc in the next 4sts, sc3tog, sc in the next 4sts, sc2tog twice as you did on
the other side, sc in the last 4sts to end. Fasten off
For the sleeves (make 2):
ch10
Round 1: Sc in the first chain st you made, then sc in every following chain st to make a loop (10sc)
Round 2: sc in each of these 10 sts
Row 3: sc in the first 8sts. Ch1, turn (8sc)
Row 4: sc2tog, sc in the next 4sts, sc2tog. Ch1, turn (6sc)
Row 5: sc in the first 6sts. Ch1, turn
Row 6: sc2tog, sc in the next 2sts, sc2tog. Ch1, turn (4sc)
Row 7: sc4tog
Fasten off
Sew these sleeves to the armholes
For the decoration:
With light blue 4ply yarn slip 9 loosely around the bottom edge of each sleeve. Cut yarn and pull the end through the final stitch (Image 1) , then use a needle to slip the end through the stitch where you started (Images 2 - 3) and then back through where it was pulled up originally (Images 4 - 5)
Seccure the yarn and the fasten off
Join the light blue yarn yarn to the top left corner of the shirt (looking at it from the front)
Sc6 down the front right edge, turn
Slip1, then sc in each of the 5sts you just made.

slip 21sts around the neckline, then when you reach the other edge sc6 down this front right edge. Fasten off.
Rejoin yarn to the top right corner of the shirt, as shown below

Sc in this st, sc in the next 4sts, slip the next st
Fasten off

For the eyes:
using black embroidery thread and a 1.5mm hook make a magic loop with 6sc. Join this with a slip st
Fasten off
using green make a magic loop with 6sc
Round 1: 2sc in each st, rep to end (12sc)
Fasten off
Sew the black circle to the centre of the back of this green circle (the back being the more bumpy bit)
Use white embroidery thread to embroider a highlight to the eye (as shown below)

Using white make a magic loop with 6sc
Round 1: 2sc in each st, rep to end (12sc)
Round 2: sc in the first st, 2sc in the next st, rep to end (18sc)
Fasten off
Sew the green circle (with the black in the middle) to the centre of the front side of this circle

Sew these eyes to the face.

For the beard and mustache:
Tear about 13 strips in the same way as you did before, and then cut these in half crosswise so you have about 26 12.5 x 0.75cm strips . Attach all but 4 of these strips around the bottom of the face (in the same way as you did for the hair), then add the remaining strands above these to make the mustache.

And that's it! I hope you enjoyed this pattern - go and check out the original pattern linked above to make a female companion for your merman. You are welcome to sell finished products but I do ask that you don't repost this pattern or claim it as your own. Thank you!


Bring your hook through a loop of the head, fold the yarn in half and pull the looped end through the head with your hook, then thread the un-looped ends of your yarn through the loop you pulled through. Tighten this, and repeat this process all over the head.
For the shirt:
With 4ply yarn and a 2mm crochet hook ch29
Round 1: sc in the first chain st you made, then sc in every following chain st to make a loop (29 sc)
Rounds 2 - 14 : (13 rounds) sc in each st
Round 15: Sc in the first 5sts. Fasten off
Fasten on yarn to the same st, and sc in that same st. Sc in the next 5sts. Fasten off
rejoin yarn to the 3rd st from where you fastened off. Sc in this st and the next 13sts. Fasten off.
Round 16: rejoin to the 3rd st from where you fastened off. Sc in this st and the next 3, sc2tog.
Fasten off
Fasten on to the next st (the st you made on the last round when you fastened off and the crocheted
into the same st). sc2tog between this st and the next st, then sc in the next 4 sts. Fasten off
rejoin yarn to the first st of the next section (the section you started after skipping two stitches when you did the last row) (as shown below)
Sc in this st and the next 5 sts, sc2tog, sc in the next 6sts. Fasten off
Rounds 17 - 18: (2 rows) rejoin yarn to the first st of the next section, as you did before.
sc in this st and the next 4sts. Fasten off
Rejoin yarn to the first st of the next section. Sc in this st and the next 4sts. Fasten off
Rejoin yarn to the first st of the next section. Sc in this st and the next 12sts
Round 18.5: (this is just a little bit that comes between rows 18 and 19 to form the armholes)
ch2, slip the fisrt st of the next section, Fasten off.
Fasten on to the last st of the next section, ch2, slip the first st of the next section. Fasten off.
Round 19: Rejoin yarn to the first st after the middle gap at the front of the shirt (the v- bit in between the armholes) (as shown below)

I found it helpful to sew in all the loose ends at this point so that it was easier to see what I was doing.

Sc in this st and the next 3sts
Sc2tog between this next st and the first chain st above the armhole, sc2tog between the next chain
st and the following st, sc in the next 4sts, sc3tog, sc in the next 4sts, sc2tog twice as you did on
the other side, sc in the last 4sts to end. Fasten off
For the sleeves (make 2):
ch10
Round 1: Sc in the first chain st you made, then sc in every following chain st to make a loop (10sc)
Round 2: sc in each of these 10 sts
Row 3: sc in the first 8sts. Ch1, turn (8sc)
Row 4: sc2tog, sc in the next 4sts, sc2tog. Ch1, turn (6sc)
Row 5: sc in the first 6sts. Ch1, turn
Row 6: sc2tog, sc in the next 2sts, sc2tog. Ch1, turn (4sc)
Row 7: sc4tog
Fasten off
Sew these sleeves to the armholes
For the decoration:
With light blue 4ply yarn slip 9 loosely around the bottom edge of each sleeve. Cut yarn and pull the end through the final stitch (Image 1) , then use a needle to slip the end through the stitch where you started (Images 2 - 3) and then back through where it was pulled up originally (Images 4 - 5)
 |
| Image 1 |
 |
| Image 2 |
 |
| Image 3 |
 |
| Image 4 |
 |
| Image 5 |
Join the light blue yarn yarn to the top left corner of the shirt (looking at it from the front)
Sc6 down the front right edge, turn
Slip1, then sc in each of the 5sts you just made.

slip 21sts around the neckline, then when you reach the other edge sc6 down this front right edge. Fasten off.
Rejoin yarn to the top right corner of the shirt, as shown below

Sc in this st, sc in the next 4sts, slip the next st
Fasten off

using black embroidery thread and a 1.5mm hook make a magic loop with 6sc. Join this with a slip st
Fasten off
using green make a magic loop with 6sc
Round 1: 2sc in each st, rep to end (12sc)
Fasten off
Sew the black circle to the centre of the back of this green circle (the back being the more bumpy bit)
Use white embroidery thread to embroider a highlight to the eye (as shown below)

Using white make a magic loop with 6sc
Round 1: 2sc in each st, rep to end (12sc)
Round 2: sc in the first st, 2sc in the next st, rep to end (18sc)
Fasten off
Sew the green circle (with the black in the middle) to the centre of the front side of this circle

Sew these eyes to the face.

For the beard and mustache:
Tear about 13 strips in the same way as you did before, and then cut these in half crosswise so you have about 26 12.5 x 0.75cm strips . Attach all but 4 of these strips around the bottom of the face (in the same way as you did for the hair), then add the remaining strands above these to make the mustache.

And that's it! I hope you enjoyed this pattern - go and check out the original pattern linked above to make a female companion for your merman. You are welcome to sell finished products but I do ask that you don't repost this pattern or claim it as your own. Thank you!


 |
| Why does this image remind me of the 1960s Doctor who mosters? |


