Showing posts with label quick makes. Show all posts

Tuesday, 22 February 2022

Smol frog

This pattern is for a very small, easy to make frog.


Difficulty:
Easy - medium

You will need:
  • A 2mm hook
  • Anchor creativa 4ply cotton in green and white
  • A scrap of black embroidery thread
  • Polyester toy stuffing
  • A darning needle for sewing up 

For the head:
Make a magic loop with 6scRound 1: make 2sc in each st (12sc)Round 2: (sc3, make 2sc in the next st) 3 times (15sc)Rounds 3 - 7: (5 rounds) sc n each stRound 8: (sc3, sc2tog) 5 times (12sc)StuffRound 9: sc2tog 6 times (6sc)Fasten off
Stuff this sectionFor the body:Make a magic loop with 6scRound 1: Make 2sc in each st (12sc)Rounds 2 - 3: (2 rounds) Sc in each stRound 4: sc2tog 6 times (6sc)Fasten off

Stuff and sew this to the bottom of the head
For the front legs:Ch3Row 1: Slip the 2nd chain st from hook and the next chain st, (ch3, slip the 2nd chain st from hook and the next chain st) twice, slip the first chain st you made, ch4, slip the 2nd chain st from hook and the next 2 chain stsFasten off

Sew these to the front of the body (the ch4 section forms the leg part, with the other chains forming the toes)For the back legs:Ch3Row 1: Slip the 2nd chain st from hook and the next chain st, (ch3, slip the 2nd chain st from hook and the next chain st) twice, slip the first chain st you made, ch9, sc in the 2nd chain st from hook and the next 7 chain stsFasten off
Fold the end of these back on themselves so that the cast-off end is in teh same place as where you started the first chain row. Sew these to the sides of the bodyFor the backs of the eyes (make 2):With green make a magic loop with 6scRound 1: Sc in each stFasten off
Sew these to the top of the headFor the eyes (make 2):With white make a magic loop with 5scFasten off neatly
Sew these to the eye back parts

For the face:
Embroider the pupils, mouth, and nostrils using black embroidery thread


That's all from this pattern - I hope you've enjoyed it! If you have any questions about this or any of my other patterns lease feel free to contact me, either by leaving a comment below or via my Ravelry or Instagram pages.(Instagram is best if you want a speedy reply). You are very welcome to sell finished products but I do ask that you don't re-post this pattern or claim it as your own. Thank you!

Saturday, 29 January 2022

small simple bird

This is a really simple bird pattern that I made ages ago and have only just gotten round to posting. It's very quick and easy to make, and is good for using up small scraps of yarn.


Difficulty:
Easy

You will need:
  • A 2.5mm crochet hook
  • orange dk yarn
  • yellow yarn (either dk or 4ply it doesn't really matter)
  • 0.5mm craft wire
  • pliers
  • A scrap of black 4ply yarn (although dk will do)
  • A small amount of white embroidery thread


For the head and body:
With orange make a magic loop with 6sc
Round 1: make 2sc in each st (12sc)
Rounds 2 - 4: (3 rounds) sc in each st
Round 5:(sc in the first st, 2sc in the next st)twice, sc3, 2sc in each of the next 2sts, sc3 (16sc)
Round 6: sc9, (sc in the first st, make 2sc in the next st)twice, sc3 (18sc)
Round 7: sc10, (sc in the first st, make 2sc in the next st)twice, sc4 (20sc)
Round 8: sc11, (sc in the first st, make 2sc in the next st)twice, sc5 (22sc)
Round 9: sc12, (sc in the first st, make 2sc in the next st)twice, sc6 (24sc)
Round 10: sc13, (sc in the first st, make 2sc in the next st)twice, sc7 (26sc)
Round 11: (sc in the first st, sc2tog) 3 times, sc5, (sc in the first st, make 2sc in the next st)twice, sc6, sc2tog (24sc)
Round 12: sc2tog 4 times, sc4, (sc in the first st, make 2sc in the next st) twice, sc5, sc3tog (20sc)
Round 13: sc3tog twice, sc5, hdc3
Fasten off
Stuff and sew up the bottom seam of the bird

For the beak:
with yellow 4ply and a 2mm hook make a magic loop with 2sc
Fasten off and sew this to the head


For the legs:
The legs are made by fashioning them out of wire around a stitch on the bottom of the bird, and then winding a length of yellow yarn around the wire repeatedly to cover it.


Attach the yellow yarn to the same st as you wound the wire for the leg around. Wind the yarn down and around the leg and feet, securing them to the ends of each toe by threading the yarn between the two sides of the length of wire that folds back on itself to make the toe.


For the eyes:
embroider an eye to each side of the head, first using black yarn for the background, and then using white embroidery thread to add highlights, as shown in the image below.


I hope you have enjoyed this pattern. Please feel free to ask me any questions below if you would like clarification on anything in this pattern. If you would like a reply quickly please contact me via my Instagram.

You are very welcome to sell finished products, but I do ask that you don't re-post this pattern or claim it as your own. Thank you!


Friday, 12 March 2021

lil' loveheart bear

This tiny bear is really quick and easy to make, and makes the perfect give for anyone you care about. She measures just under 10cm tall.


Difficulty:

Easy


You will need:
A 2.5mm crochet hook
A 2mm crochet hook
White dk yarn
4ply yarn in red and black
Polyester toy stuffing
A darning needle
A pair of scissors


Note:
  • 'fasten off neatly' refers to a special way of fastening off which is neater and makes it easier to see where you should be crocheting on the next round (also known as invisible fastening off). This involves pulling up your yarn through your stitch, threading the yarn underneath the second stitch from where you pulled your yarn up, then threading your yarn back through the top of this stitch and down through the back of the work. There is a very helpful site that explains it clearly found here. Just make sure when you do this that you thread your needle through the SECOND stitch after the last stitch you made, otherwise you will end up with an extra stitch which may mean that all of the following rounds are out of line with each other.

For the body (starting from the base):
With white dk yarn and a 2.5mm hook make a magic loop with 6sc

Round 1: make 2sc in each st (12sc)
Round 2: (sc in the first 3sts, make 2sc in the next st) 3 times (15sc)
Rounds 3 - 6: (4 rounds) sc in each st
Round 7: (sc in the first 3sts, sc3tog) 5 times (12sc)
Round 8: sc2tog 6 times (6sc)
Round 9: make 2sc in each st (12sc)
Round 10: (sc in the first 3sts, make 2sc in the next st) 3 times (15sc)
Rounds 11 - 13: (3 rounds) sc in each st
Round 14: (sc in the first 3sts, sc2tog) 5 times (12sc)
Stuff firmly
Round 15: sc2tog 6 times (6sc)
Fasten off

For the arms:
With white dk yarn and a 2.5mm hook make a magic loop with 6sc
Rounds 1 - 3: (3 rounds) sc in each st
Stuff
Round 4: Sc, sc2tog, sc, sc2tog (4sc)
Fasten off
Sew these to the sides of the body

For the legs:
With white dk yarn and a 2.5mm hook make a magic loop with 6sc
Round 1: (sc in the first st, make 2sc in the next st) 3 times (9sc)
Rounds 2 - 4: (3 rounds) sc in each st
Stuff
Round 5: (sc in the first st, sc2tog) 3 times (6sc)
Fasten off
Sew these to the base of the body

For the ears:
With white dk yarn and a 2.5mm hook make a make a magic loop with 4hdc
Fasten off
Sew these to the top of the head

For the muzzle:
With white dk yarn and a 2.5mm hook make a magic loop with 6sc
Round 1: Sc in each st
Fasten off

Stuff this gently and sew to the front of the face. Use black 4ply yarn to embroider facial features


For the heart:
With red 4ply yarn and a 2mm hook make a magic loop with 6sc
Round 1: sc in each st
Fasten off neatly

Make a magic loop with 6sc
Round 1: sc in each st
Round 2: sc in the first 5sts, then sc in one of the sts of the other section of the heart you made. Sc in the next 4sts of this section (so that you have made 5sc sts in each one) (10sc)
Round 3: sc in the first st of the last round, sc2tog, sc3, sc2tog, sc2 (8sc)
Round 4: Sc, sc2tog, sc2, sc2tog, sc (8sc)
Round 5: Sc3tog
Fasten off

Sew this between the hands of the bear.


That's all from this pattern! I hope you have enjoyed it :) If you have any questions places don't hesitate to contact me, either by leaving a comment below or via my Ravelry or Instagram pages (Instagram is best if you want a speedy reply). You may also want to follow my Instagram to keep up to date with the projects I'm working on and find out whenever I post a new pattern.
As with most of my work, you are welcome to sell finished projects, but I do ask that you don't re-post this pattern or claim it as your own. Thank you!

Saturday, 2 May 2020

Cheeky Monkey Pencil Topper

This little cheeky monkey was made for my Grandma to keep her company whilst doing her crosswords - she's currently in self-isolation with my Grandad so I reckon she needs a little friend :)


Difficulty:
Easy - medium

This pattern requires you to make an i-cord, which can be a bit fiddly, but its pretty simple aside from that.


You will need:
  • A 2mm crochet hook
  • A 2.5mm crochet hook
  • Dk yarn in dark brown
  • 4ply yarn in light brown
  • Embroidery thread in black and white
  • A darning needle
  • An embroidery needle
  • Toy stuffing

For the head and body:
Using a 2.5mm hook and dark brown dk yarn make a magic loop with 6sc
Round 1: sc in each st
Round 2: (sc in the first st, make 2sc in the next st) 3 times (9sc)
Rounds 3 - 4: (2 rounds) sc in each st
Round 5: (sc inthe first st, sc2tog) 3 times (6sc)
Stuff firmly
Round 6: (sc, sc2tog) twice (4sc)
Round 7: make 2sc in each st (8sc)
Rounds 8 - 11: (4 rounds) sc in each st
Stuff firmly
Round 12: sc2tog 4 times (4sc)
Fasten off

For the legs (make 2):
With a 2mm hook and dark brown dk yarn make an icord 4cm long

(If you don't know how to make an i-cord a video tutorial can be found here)
Sew these to the base of the body


For the arms (make 2):
With a 2mm hook make an icord 2.5cm long
Sew these to the body


For the hands (make 2):
With a 2mm hook and light brown 4ply yarn make a magic loop with 4sc

Rounds 1 - 2: (2 rounds) sc in each st
Fasten off
Sew these to the ends of the arms

For the feet (make 2):
With a 2mm hook and light brown 4ply yarn make a magic loop with 6sc

Rounds 1 - 3: (3 rounds) sc in each st
Fasten off
Sew these to the ends of the legs.

This is now a good point to sew the snap fasteners in place. You should sew one to each side of the head just above where you sewed the arms in place. You should then sew the other sides to the hands. Make sure when you do this that they are positioned so that the monkey is able to wrap tightly around the pencil. If not adjust the positioning of the snap fasteners slightly to ensure your monkey stays on the pencil you intend to use.


For the ears (make 2):
With dark brown dk and a 2.5mm hook make a magic loop with 5sc. Don't join

Fasten off

With light brown 4ply and a 2mm hook make a magic loop with 4sc. Once again don't join this.
Fasten off

Sew the lighter section to the darker one, then sew each of the ears to the head, just above where you sewed the snap fasteners in place.


For the muzzle:

With light brown 4ply yarn and a 2mm hook make a magic loop with 6sc
Round 1: sc in each st
Fasten off
Sew this to the lower half of the face

For the face patch:
With light brown 4ply yarn and a 2mm hook make a magic loop with 5hdc. Don't join this.
Fasten off
Sew this to the face just above the muzzle.


For the eyes:
Sew the eyes in place using black embroidery thread, then use a single strand to embroider the highlights in place.


Now all that's left to do is to fold the arms around your pencil and snap them in place using the snap fasteners. You may also want to tie the legs around your pencil to keep them in position.


I hope you have enjoyed this pattern. If you have any questions about this or any of my other patterns, please don't hesitate to get in contact with me, either by leaving a comment below, or via my Ravelry or Instagram pages. You are very welcome to sell finished products, but I do ask that you don't re-post this pattern or claim it as your own. Thank you!!!


Monday, 4 June 2018

LGBT Pride flag pencil toppers


Since June is LGBT Pride Month I wanted to do something to celebrate, so,  inspired by the pencil topper made by simply crochet magazine (this pattern can be found here) I made a variety of LGBT pride flags.


The pencil toppers I have made use dk yarn and are slightly smaller than the one made by simply crochet magazine (so should take less time to make (They each took  me around 20  minutes to make)

You can alter the number of chain sts you make to fit it onto pens or similar objects (eg. crochet hooks). I made my Gay Pride flag fit my Parker fountain pen by making ch7 for the first 3 rows then ch6 for the next 3 rows (you will see what I mean when you start making it)


You will need:


  • A 2mm hook
  • dk yarn in the correct colours for the flag you want to make : gay pride flag = red, orange, yellow, green, blue, and purple; transgender flag = light blue, light pink, white; bisexual flag = dark blue, lilac, bright pink; pansexual flag = bluey-turquoise, yellow, bright pink; lesbian flag = dark red, brownish-red, light pink, white, bright  (ish) pink, darker pink, dark pink; genderqueer flag = green, white, lilac; asexual flag = purple, white, grey, black; aromantic flag = black, grey, white, light green, medium green; Non-binary flag = black, purple, white, yellow
  • A darning needle for weaving in loose ends
  • A pencil (or pen) to put it on


Difficulty:

Easy


For the pride flag pencil topper:


With the 2mm hook and purple yarn ch10
Row 1: sc in the 2nd chain st you made, then sc in each of the 8 following chain sts. ch5, then slip the last sc st you made.
Fasten off
Row 2: join blue yarn to the first sc st you made (the other end of where you made the loop). sc in this st and the next 8sts. ch5, then slip the last sc st you made, as you did for the last row. 
Fasten off
Row 3: do as for the last row with green
Fasten off
Row 4: do as for row 2 with yellow
Fasten off
Row 5: do as for row 2 with orange
Fasten off
Row 6: do as for row 2 with red
Fasten off

Sew in the loose ends, then slip the loops you made with your chain sts over the end of the pencil.


To make the transgender flag:

With light blue yarn ch10
Row 1: sc in the 2nd loop from hook, sc in every following loop. ch5, sc in the last sc st you made
Fasten off
Row 2: join light pink yarn to the first sc st you made (the other end of where you made the loop). sc in this st and the next 8sts. ch5, then slip the last sc st you made, as you did for the last row.
Fasten off
Row 3: do as for the last row using white yarn
Fasten off
Row 4: do as for row 2 using light pink yarn
Fasten off
Row 5: do as for row 2 using light blue yarn
Fasten off


For the bisexual flag:

With dark blue yarn ch10
Row 1: sc in the 2nd chain st you made, then sc in each of the 8 following chain sts. ch5, then slip the last sc st you made.
Row 2: ch1, sc in the same st each of the next 8sts
Fasten off
Row 3: join lilac yarn to this same st. sc in this st and the next 8sts. ch5, then slip the last sc st you made, as you did for the last row. 
Fasten off
Round 4: join pink yarn to the same st as where you fastened off. Sc in this st and the next 8sts. ch1, turn
Row 5: sc in each of these 9sts, ch5, slip the last sc st you made in this row
Fasten off


Sew in the loose ends, then slip the loops you made with your chain sts over the end of the pencil.


For the lesbian flag:

with dark red dk yarn chain 11
Row 1: sc in the 2nd loop from hook, sc in every following loop. ch5, sc in the last sc st you made
Fasten off
Row 2: join brownish - red yarn to the first sc st you made (the other end of where you made the loop). sc in this st and the next 9sts. ch5, then slip the last sc st you made, as you did for the last row.
Fasten off
Row 3: do as for the last row using light pink yarn
Fasten off
Row 4: do as for row 2 using white yarn
Fasten off
Row 5: do as for row 2 using bright(ish) pink yarn
Fasten off
Row 6: do as for row 2 using dark (ish) pink yarn
Fasten off
Row 7: do as for row 2 using dark pink yarn
Fasten off


Sew in the loose ends, then slip the loops you made with your chain sts over the end of the pencil.


For the Pansexual flag:

With bluey- turquise dk yarn ch10
Row 1: sc in the 2nd loop from hook, sc in every following loop. ch5, sc in the last sc st you made
Row 2: ch1, sc in this same st that you slipped, sc in every following st to end
Fasten off
Row 3: join yellow yarn to this same st, sc in this st and every following st to the other end. ch5, sc in the last sc st you made
Row 4: As row 2 but using yellow yarn
Fasten off
Row 5: As row 3 but using bright pink yarn
Row 4: As row 2 but using bright pink yarn

Fasten off

For the asexual flag:


Using purple dk yarn ch11Row 1: sc in the 2nd loop from hook, sc in every following loop. ch5, sc in the last sc st you made.
Row 2: ch1, sc in this same st that you slipped, sc in every following st to end
Fasten off
Row 3: join white yarn to this same st, sc in this st and every following st to the other end. ch5, sc in the last sc st you made
Row 4: As row 2 but using white
Fasten off
Row 5: As row 3 but using grey yarn
Row 4: As row 2 but using grey yarn
Row 7: As row 3 but using black yarn

Row 8: As row 2 but using black yarn
Fasten off


For the genderqueer flag:

With green dk yarn ch10
Row 1: sc in the 2nd loop from hook, sc in every following loop. ch5, sc in the last sc st you made
Row 2: ch1, sc in this saem st that you slipped, sc in every following st to end
Fasten off
Row 3: join white yarn to this same st, sc in this st and every following st to the other end. ch5, sc in the last sc st you made
Row 4: As row 2 but using white yarn
Fasten off
Row 5: As row 3 but using lilac yarn
Row 4: As row 2 but using lilac yarn
Fasten off


For the aromantic flag:

With black yarn ch10
Row 1: sc in the 2nd loop from hook, sc in every following loop. ch5, sc in the last sc st you made
Fasten off
Row 2: join light grey yarn to the first sc st you made (the other end of where you made the loop). sc in this st and the next 8sts. ch5, then slip the last sc st you made, as you did for the last row.
Fasten off
Row 3: do as for the last row using white yarn
Fasten off
Row 4: do as for row 2 using light light green
Fasten off
Row 5: do as for row 2 using light medium green

Fasten off


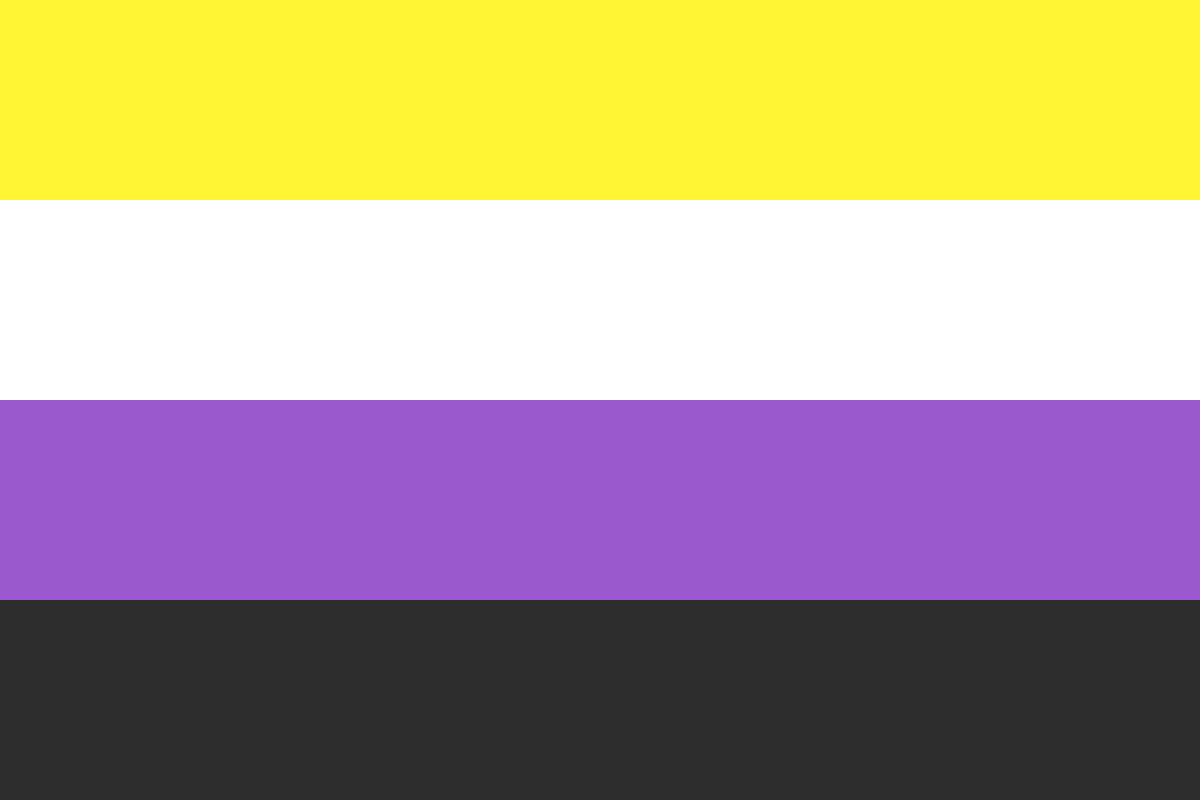
For the non-binary flag:
Non-binary gender - Wikipedia
With black yarn ch10
Row 1: sc in the 2nd loop from hook, sc in every following loop. ch5, sc in the last sc st you made
Fasten off
Row 2: join light purple yarn to the first sc st you made (the other end of where you made the loop). sc in this st and the next 8sts. ch5, then slip the last sc st you made, as you did for the last row.
Fasten off
Row 3: do as for the last row using white yarn
Fasten off
Row 4: do as for row 2 using light yellow
Fasten off