These hands are the second installment of the anatomically correct skeleton pattern that I am slowly uploading. The first is the skull, which can be found here.
Both the hands and the skull are approximately 1/5 size scale.


Difficulty:

Medium - difficult
The stitches themselves aren't too complicated but the bones are very fiddly as they are so small.You will need:
- White regular sewing cotton
- A 0.6mm crochet hook
- A regular sewing needle
- Toy stuffing
- cocktail stick
- "sc12" means "sc in each of the next 12 sts"
- Whilst you are making each bone, try to stuff it as you go along, using the cocktail stick to push the stuffing into your crochet. Try to stuff each of the bones firmly so that they hold their shape.
- For each of the hand bones you make try to shape them after you have made them to try and make them resemble the diagrams given.

For the carpal bones (Make 2 of each):
For the scaphoid:
 |
| This bone is worked from the left to the right |
Make a magic loop with 6sc
Rounds 1 - 2: (2 rounds) sc in each st
Round 3: 2sc in each of the first 2sts, sc, slip2, sc (8sc)
Rounds 4 - 5: (2 rounds) (2 rounds) hdc4, slip4
Rounds 6 - 8: (3 rounds) sc in each st
Stuff firmly
Round 9: sc2tog 4 times to end
Fasten off
For the lunate:
 |
| This bone is worked from left to right (although its pretty much symmetrical so it doesn't matter too much) |
Round 1: sc in the 2nd chain from hook, then sc in the next one. Make 3sc in the last chain st (the first one you made), then sc into the back of the previous chain st you crocheted into. Make 2sc into the back of the first chain st you crocheted into. (8sc)
Round 2: sc2, 2sc in each of the next 3sts, sc3 (11sc)
Round 3: sc8, sc3tog (9sc)
Round 4: sc7, sc2tog (8sc)
Round 5: Sc in each st
Round 6: sc2, sc2tog, sc2, 2sc in each of the next 2sts (9sc)
Round 7: sc8, 3sc in the next st (11sc)
Round 8: sc2, sc2tog 3 times, sc3 (8sc)
Stuff firmly
Fasten off
For the pisiform:
 |
| This bone is worked from the bottom upwards |
Round 1: (sc, 2sc in the following st) twice (6sc)
Round 2: sc4, 2sc in the next st, sc (7sc)
Round 3: sc in each st
Round 4: sc5, sc2tog (6sc)
Stuff firmly
Round 5: (this is slightly more than 1 round) sc5, sc3tog (4sc)
For the Triquetral:
 |
| This bone is worked from the top downwards |
Make a magic loop with 6sc
Rounds 1 - 2: (2 rounds) sc in each st
Round 3: 2sc in each of the first 2sts, sc4 (8sc)
Round 4: sc, 2sc in the next st, sc6 (9sc)
Stuff firmly
Round 5: sc, sc3tog, sc2, sc3tog (5sc)
Fasten off
For the Trapezoid:
 |
| This bone is worked from left to right |
ch5
Round 1: sc in the 2nd chain from hook, then sc in the next 2 chain sts. Make 3sc in the last chain st (the first one you made), then sc into the back of the previous 2 chain sts you crocheted into. Make 2sc into the back of the first chain st you crocheted into. (0sc)
Round 2: sc3, sc3tog, sc4 (8sc)
Rounds 3 - 5: (3 rounds) sc in each st
Stuff firmly
Round 6: sc2, hdc, sc2, sc3tog (6sc)
Round 7: sc, hdc
Fasten off
For the Trapezium:
 |
| This bone is worked from the bottom upwards |
Round 1: (2sc in the first st, sc) twice (6sc)
Round 2: sc in each st
Round 3: (2sc in the first st, sc2) twice (8sc)
Round 4: 3sc in the first st, sc7 (10sc)
Round 5: sc, 2sc in the next st, sc8 (11sc)
Stuff firmly
Round 6: ch1, skip5, sc, ch1, skip4, sc
Round 7: sc in these last 4 sts/ chain sts you made
Fasten off
For the Hamate:
 |
| This bone is worked from the top downwards |
ch5
Round 1: sc in the 2nd chain from hook, then sc in the next 2sts. Make 3sc in the last chain st (the first one you made), then sc into the back of the previous 2 chain sts you crocheted into in turn. Make 2sc into the back of the first chain st you crocheted into. (10sc)
Rounds 2 - 4: (3 rounds) sc in each st
Stuff firmly
Round 5: sc2, ch1, hdc, skip2, 2hdc in the next st, skip6, sc in the first hdc st you made.
Fasten off
For the capitate:
 |
| This bone is worked from the bottom upwards |
Make a magic loop with 6sc
Round 1: (2sc in the first st, sc2) twice (8sc)
Round 2: Sc in each st
Round 3: (2sc in the first st, sc3) twice (10sc)
Rounds 4 - 5: (2 rounds) sc in each st
Stuff firmly
Round 6: sc3tog, slip2, ch1, hdc3, sc, skip6, slip1
Fasten off
For the metacarpals (make 2 of each):
 |
| These bones are all worked from the head to the base |
For the pinkie finger:
Make a magic loop with 6sc
Round 1: (sc, 2sc in the next st) 3 times (9sc)
Rounds 2 - 3: (2 rounds) sc in each st
Stuff firmly
Round 4: (sc, sc2tog) 3 times (6sc)
Rounds 5- 12: (8 rounds) sc in each st
Round 13: 2sc in each of the first 3sts, sc3 (9sc)
Rounds 14 - 15: (2 rounds) sc in each st
Stuff firmly
Round 16: sc2tog 4 times
Fasten off
For the ring finger:
Make a magic loop with 6sc
Round 1: (sc, 2sc in the next st) 3 times (9sc)
Rounds 2 - 3: (2 rounds) sc in each st
Round 4: (sc, sc2tog) 3 times (6sc)
Rounds 5 - 6: (2 rounds) sc in each st
Stuff firmly
Round 7: sc2tog, sc4 (5sc)
Rounds 8 - 9: (2 rounds) sc in each st
Round 10: sc2tog, sc3 (4sc)
Round 11: make 2sc in each of these 4sts (8sc)
Rounds 12 - 13: (2 rounds) sc in each st
Stuff firmly
Round 14: Sc2tog 5 times
For the middle finger:
Make a magic loop with 6sc
Round 1: make 2sc in each st (12sc)
Rounds 2 - 3: (2 rounds) sc in each st
Round 4: (sc, sc2tog) 4 times (8sc)
Round 5: sc in each st
Round 6: (sc2, sc2tog) twice (6sc)
Rounds 7 - 11: (5 rounds) sc in each st
Stuff firmly
Round 12: sc2tog, sc4 (5sc)
Rounds 13 - 14: (2 rounds) sc in each st
Round 15: 2sc in the first st, sc2, 2sc in the next st, sc (7sc)
Round 16: sc, 2sc in the next st, sc3, 2sc in the following st, sc (9sc)
Round 17: (sc2, 2sc in the next st) 3 times (12sc)
Round 18: sc in each st
Stuff firmly
Round 19: sc2tog 6 times (6sc)
For the index finger:
Make a magic loop with 6sc
Round 1: make 2sc in each st (12sc)
Round 2: 2sc in the first st, sc2, 2sc in the next st, sc8 (14sc)
Rounds 3 - 4: (2 rounds) sc in each st
Round 5: (sc3tog, sc4) twice (10sc)
Round 6: sc in each st
Round 7: (sc2tog, sc3) twice (8sc)
Rounds 8 - 13: (6 rounds) sc in each st
Stuff firmly
Round 14: (sc2, sc2tog) twice (6sc)
Rounds 15 - 16: (2 rounds) sc in each st
Round 17: (sc2, 2sc in the next st) twice (8sc)
Round 18: (sc3, 2sc in the next st) twice (10sc)
Round 19: (sc4, 2sc in the next st) twice (12sc)
Round 20: (sc5, 2sc in the next st) twice (14sc)
Round 21: sc in each st
Stuff firmly
Round 22: sc2tog 7 times (7sc)
Fasten off neatly
For the thumb:
Make a magic loop with 6sc
Round 1: Make 2sc in each st (12sc)
Rounds 2 - 3: (2 rounds) sc in each st
Round 4: (sc4, sc2tog) twice (10sc)
Round 5: (sc3, sc2tog) twice (8sc)
Rounds 6 - 10: (5 rounds) sc in each st
Round 11: (sc3, 2sc in the next st) twice (10sc)
Round 12: (sc4, 2sc in the next st) twice (12sc)
Rounds 13 - 14: (2 rounds) sc in each st
Stuff firmly
Round 15: Sc2tog 6 times
Fasten off
For the phalanges (Make 2 of each):

Proximal phalanges


For the index and middle finger:
Make a magic loop with 6sc
Round 1: make 2sc in each st (12sc)
Round 2: sc in each st
Round 3: (sc in the first 2sts, sc2tog) 3 times (9sc)
Round 4: (sc in the first st, sc2tog) 3 times (6sc)
Rounds 5 - 6: (2 rounds) sc in each st
Round 7: (sc in the first st, make 2sc in the next st) 3 times (9sc)
Round 8: (sc in the first 2sts, make 2sc in the next st) 3 times (12sc)
Round 9: sc in each st
Round 10: (sc in teh first st, sc2tog) 3 times (6sc)
Fasten off
For the ring finger:
Make a magic loop with 5sc
Round 1: make 2sc in each st (10sc)
Round 2: sc2tog 5 times (5sc)
Rounds 3 - 5: (3 rounds) sc in each st
Round 6: make 2sc in each st (10sc)
Round 7: Sc in each st
Round 8: sc2tog 5 times (5sc)
Fasten off
For the pinkie finger:
Make a magic loop with 5sc
Round 1: make 2sc in each st (10sc)
Round 2: sc2tog 5 times (5sc)
Rounds 3 - 4: (2 rounds) sc in each st
Round 5: make 2sc in each st (10sc)
Round 6: sc2tog 5 times (5sc)
Fasten off
Middle/Intermediate phalanges

For the index, middle, and ring fingers:
Make a magic loop with 6sc
Round 1: (sc in the first st, make 2sc in the next st) 3 times (9sc)
Round 2: (sc in the first st, sc2tog) 3 times (6sc)
Rounds 3 - 5: (3 rounds) sc in each st
Round 6:(sc in the first st, make 2sc in the next st) 3 times (9sc)
Round 7: (sc in the first st, sc2tog) 3 times (6sc)
Fasten off
For the pinkie finger:
Make a magic loop with 6sc
Round 1: (sc in the first st, make 2sc in the next st) 3 times (9sc)
Round 2: (sc in the first st, sc2tog) 3 times (6sc)
Rounds 3 - 4: (2 rounds) sc in each st
Round 5:(sc in the first st, make 2sc in the next st) 3 times (9sc)
Round 6: (sc in the first st, sc2tog) 3 times (6sc)
Fasten off
Distal phalanges
For the fingers (Make 4 for each hand):
Make a magic loop with 6sc
Rounds 1 - 2: (2 rounds) sc in each st
Stuff firmly
Round 3: (sc, sc2tog) twice (4sc)
Round 4: sc in each st
Round 5: make 2sc in each of these 4 sts (8sc)
Round 6: (sc, 2sc in the next st) 4 times (12sc)
Stuff firmly
Round 7: sc2tog 6 times (6sc)
Fasten off

For the thumb:
Make a magic loop with 6sc
Round 1: (sc, 2sc in the next st) 3 times (9sc)
Round 2: sc in each st
Round 3: (sc, sc2tog) 3 times (6sc)
Rounds 4 - 5: (2 rounds) sc in each st
Round 6: make 2sc in each st (12sc)
Round 7: (sc3, 2sc in the next st) 3 times (15sc)
Stuff firmly
Round 8: (sc, sc2tog) 5 times (10sc)
Round 9: sc2tog 5 times (5sc)
Fasten off neatly

Part C: making them up
Lay out all of the finger bones in their relative positions, as shown below

For the fingers:
Lay out each of the fingers as shown below.


2. Next place the triquetral behind the lunate slightly above so that the top of it sticks out a little above the lunate. It should be placed so that the pointy end of the triquetral is pointing downwards, as shown below. When it is in the orrect position sew it in place


3. The pisiform is attached next. This lies to the left of the triquetral and lunate nestling slightly into any gap between them with the thinner end pointing outwards. Sew this in place.

4. Next, add the capitate. This sits just behind the scaphoid next to the lunate but not right next to it (You need to leave a little gap to add a bit of another bone later). The rounded end should be facing down so that the little mini spikes on the opposite end point upwards. Sew this in place.
5. The hamate is the next to be added. This is added in between the scaphoid, lunate, and capitate, with the non-pointed side nestling in the gap you left when you added the capitate, so that the other side sticks out behind the lunate, triquetral, and pisiform. Sew it in place


6. After this you need to add the trapezoid. This is added to the back of the scaphoid so that the rounded bit on the other corner tucks behind the hamate. Sew it in place.


7. Finally, add the trapezium. This is sewn onto the end of the scaphoid with the pointy end on the inner edge (next to the trapezoid)

As explained above, the left hand is the same as the right hand but opposite. I have included images of the creation of the left hand, and the explanation of what is going on is the same as for the right hand.


To finish off:
Finally, you need to sew the finger bones to those if the wrist. The thumb bone is sewn to the trapezium, the index finger is sewn to the trapezoid, the middle finger is sewn to the capitate, and the bones of both the ring and pinkie finger are sewn to the hamate.


You may also want to sew a line of stitching through the top of the metacarpals to hold them together and make the hand look more natural.
Round 4: (sc, sc2tog) 3 times (6sc)
Rounds 5- 12: (8 rounds) sc in each st
Round 13: 2sc in each of the first 3sts, sc3 (9sc)
Rounds 14 - 15: (2 rounds) sc in each st
Stuff firmly
Round 16: sc2tog 4 times
Fasten off
For the ring finger:
Make a magic loop with 6sc
Round 1: (sc, 2sc in the next st) 3 times (9sc)
Rounds 2 - 3: (2 rounds) sc in each st
Round 4: (sc, sc2tog) 3 times (6sc)
Rounds 5 - 6: (2 rounds) sc in each st
Stuff firmly
Round 7: sc2tog, sc4 (5sc)
Rounds 8 - 9: (2 rounds) sc in each st
Round 10: sc2tog, sc3 (4sc)
Round 11: make 2sc in each of these 4sts (8sc)
Rounds 12 - 13: (2 rounds) sc in each st
Stuff firmly
Round 14: Sc2tog 5 times
For the middle finger:
Make a magic loop with 6sc
Round 1: make 2sc in each st (12sc)
Rounds 2 - 3: (2 rounds) sc in each st
Round 4: (sc, sc2tog) 4 times (8sc)
Round 5: sc in each st
Round 6: (sc2, sc2tog) twice (6sc)
Rounds 7 - 11: (5 rounds) sc in each st
Stuff firmly
Round 12: sc2tog, sc4 (5sc)
Rounds 13 - 14: (2 rounds) sc in each st
Round 15: 2sc in the first st, sc2, 2sc in the next st, sc (7sc)
Round 16: sc, 2sc in the next st, sc3, 2sc in the following st, sc (9sc)
Round 17: (sc2, 2sc in the next st) 3 times (12sc)
Round 18: sc in each st
Stuff firmly
Round 19: sc2tog 6 times (6sc)
For the index finger:
Make a magic loop with 6sc
Round 1: make 2sc in each st (12sc)
Round 2: 2sc in the first st, sc2, 2sc in the next st, sc8 (14sc)
Rounds 3 - 4: (2 rounds) sc in each st
Round 5: (sc3tog, sc4) twice (10sc)
Round 6: sc in each st
Round 7: (sc2tog, sc3) twice (8sc)
Rounds 8 - 13: (6 rounds) sc in each st
Stuff firmly
Round 14: (sc2, sc2tog) twice (6sc)
Rounds 15 - 16: (2 rounds) sc in each st
Round 17: (sc2, 2sc in the next st) twice (8sc)
Round 18: (sc3, 2sc in the next st) twice (10sc)
Round 19: (sc4, 2sc in the next st) twice (12sc)
Round 20: (sc5, 2sc in the next st) twice (14sc)
Round 21: sc in each st
Stuff firmly
Round 22: sc2tog 7 times (7sc)
Fasten off neatly
For the thumb:
Make a magic loop with 6sc
Round 1: Make 2sc in each st (12sc)
Rounds 2 - 3: (2 rounds) sc in each st
Round 4: (sc4, sc2tog) twice (10sc)
Round 5: (sc3, sc2tog) twice (8sc)
Rounds 6 - 10: (5 rounds) sc in each st
Round 11: (sc3, 2sc in the next st) twice (10sc)
Round 12: (sc4, 2sc in the next st) twice (12sc)
Rounds 13 - 14: (2 rounds) sc in each st
Stuff firmly
Round 15: Sc2tog 6 times
Fasten off
 |
| sorry about the blurriness |
For the phalanges (Make 2 of each):

Proximal phalanges


Make a magic loop with 6sc
Round 1: make 2sc in each st (12sc)
Round 2: sc in each st
Round 3: (sc in the first 2sts, sc2tog) 3 times (9sc)
Round 4: (sc in the first st, sc2tog) 3 times (6sc)
Rounds 5 - 6: (2 rounds) sc in each st
Round 7: (sc in the first st, make 2sc in the next st) 3 times (9sc)
Round 8: (sc in the first 2sts, make 2sc in the next st) 3 times (12sc)
Round 9: sc in each st
Round 10: (sc in teh first st, sc2tog) 3 times (6sc)
Fasten off
For the ring finger:
Make a magic loop with 5sc
Round 1: make 2sc in each st (10sc)
Round 2: sc2tog 5 times (5sc)
Rounds 3 - 5: (3 rounds) sc in each st
Round 6: make 2sc in each st (10sc)
Round 7: Sc in each st
Round 8: sc2tog 5 times (5sc)
Fasten off
For the pinkie finger:
Make a magic loop with 5sc
Round 1: make 2sc in each st (10sc)
Round 2: sc2tog 5 times (5sc)
Rounds 3 - 4: (2 rounds) sc in each st
Round 5: make 2sc in each st (10sc)
Round 6: sc2tog 5 times (5sc)
Fasten off
Middle/Intermediate phalanges
Make a magic loop with 6sc
Round 1: (sc in the first st, make 2sc in the next st) 3 times (9sc)
Round 2: (sc in the first st, sc2tog) 3 times (6sc)
Rounds 3 - 5: (3 rounds) sc in each st
Round 6:(sc in the first st, make 2sc in the next st) 3 times (9sc)
Round 7: (sc in the first st, sc2tog) 3 times (6sc)
Fasten off
For the pinkie finger:
Make a magic loop with 6sc
Round 1: (sc in the first st, make 2sc in the next st) 3 times (9sc)
Round 2: (sc in the first st, sc2tog) 3 times (6sc)
Rounds 3 - 4: (2 rounds) sc in each st
Round 5:(sc in the first st, make 2sc in the next st) 3 times (9sc)
Round 6: (sc in the first st, sc2tog) 3 times (6sc)
Fasten off
Distal phalanges
For the fingers (Make 4 for each hand):
Make a magic loop with 6sc
Rounds 1 - 2: (2 rounds) sc in each st
Stuff firmly
Round 3: (sc, sc2tog) twice (4sc)
Round 4: sc in each st
Round 5: make 2sc in each of these 4 sts (8sc)
Round 6: (sc, 2sc in the next st) 4 times (12sc)
Stuff firmly
Round 7: sc2tog 6 times (6sc)
Fasten off

For the thumb:
Make a magic loop with 6sc
Round 1: (sc, 2sc in the next st) 3 times (9sc)
Round 2: sc in each st
Round 3: (sc, sc2tog) 3 times (6sc)
Rounds 4 - 5: (2 rounds) sc in each st
Round 6: make 2sc in each st (12sc)
Round 7: (sc3, 2sc in the next st) 3 times (15sc)
Stuff firmly
Round 8: (sc, sc2tog) 5 times (10sc)
Round 9: sc2tog 5 times (5sc)
Fasten off neatly

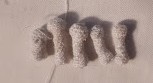
 |
| Image showing all of the phalanges in their relative places |
Lay out all of the finger bones in their relative positions, as shown below

Lay out each of the fingers as shown below.

For the bones of each finger, secure thread to the bases end of the metacarpal, and thread it up through the middle of this bone and each subsequent bone. Pull tight to bring the bones together, and then secure. You may wish to also thread the yarn back the other way and secure at the opposite end to ensure the bones are held together tightly, but not too tightly that they are no longer movable.


For the wrist bones:
The wrist bones are built up one by one. I started with the right hand and then did the left hand after, with each bone being in the opposite orientation to its location in the right hand. Try not to sew the bones too tightly together as often you will need to nestle other bones in between existing ones.
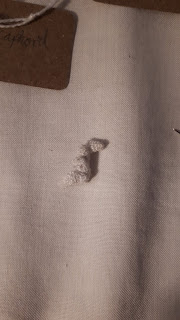
Sorry about the blurriness of the images, it was difficult to take clear photos with the bones being so small.
1. First place the scaphoid and lunate in the following position, with the lunate on the left and the scaphoid in front on the right. Sew them together in this orientation.


 |
| The triquetral is circled in this photo |

 |
| The pisiform is circled |
 |
| View from above. The pisiform is the left-most bone |
 |
 |
| The capitate is circled |


 |
| The wrist bones so far should look something like this |

 |
| Trapezoid is circled |

 |
| The trapezium is circled |
As explained above, the left hand is the same as the right hand but opposite. I have included images of the creation of the left hand, and the explanation of what is going on is the same as for the right hand.


 |
| I have placed the pisiform in slightly the wrong place in this photo - it should be in front of the triquetral not behind (the same as on the right hand), sorry! |


Finally, you need to sew the finger bones to those if the wrist. The thumb bone is sewn to the trapezium, the index finger is sewn to the trapezoid, the middle finger is sewn to the capitate, and the bones of both the ring and pinkie finger are sewn to the hamate.


 |
| Back view |
And that's all! I hope you have enjoyed this pattern, if you have any questions about this or any of my other patterns, please feel free to get in contact with me, either by leaving a comment below, or via my Ravelry or Instagram pages.
You are very welcome to sell finished products, but I do ask that you don't repost this pattern or claim it as your own. Thank you!