This pattern is part of a series of patterns I'm making to celebrate pride month. If you'd like to see more of the things I've been working on you can follow me on my Instagram page to keep up to date with them all.


Difficulty:

Medium - difficult
This difficulty rating is mostly down to the jacket being rather fiddly
You will need:
- dk yarn in tan and black plus scraps of red
- white 4ply yarn
- white crochet cotton (around #8 - #10 size)
- Embroidery thread in black, white, brown, and silvery-grey
- A 2mm crochet hook
- A 2.5mm hook
- A 1mm hook
- white 4ply yarn
- 0.5mm craft wire
- A pair of pliers
- Wire cutters (although a pair of sharp scissors will probably do)
- A darning needle
- Toy stuffing
Note:
- This pattern includes the back-to-front single crochet stitch (bfsc). A video to show you how to do this can be found here. It's pretty simple but if you can't work it out you can just use a regular single crochet stitch, but this will give it a slightly different look.
For the body:
With a 2.5mm hook and tan dk yarn make a magic loop with 6sc
Round 1: make 2sc in each st (12sc)
Round 2: (sc in the first st, make 2sc int eh next st) 6 times (18sc)
Round 3: (sc in the first 2sts, make 2sc in the next st) 6 times (24sc)
Rounds 4 - 10: (7 rounds) sc in each st
Round 11: (sc2, sc2tog) 6 times (18sc)
Round 12: (sc, sc2tog) 6 times (12sc)
Round 13: (sc, sc2tog) 3 times (8sc)
Rounds 14 - 15: (2 rounds) sc in each st
Row 16: sc in each st, turn
Row 17: slip4. ch1, turn
Row 18: sc4
Fasten off
Stuff firmly
For the arms (make 2):
With beige make a magic loop with 6sc
Round 1: sc in the first st, 2sc in the next st, rep to end (9sc)
Rounds 2 - 3: (2 rounds) sc in each st (9sc)
Round 4: sc in the first st, sc2tog, rep to end (6sc)
Round 5: sc in each st
Fasten off black yarn and fasten on grey yarn.
Rounds 6 - 9: (4 rounds) sc in each st (6sc)
Fasten off
Lightly stuff these arms and sew them to the sides of the bodyWith beige make a magic loop with 6sc
Round 1: sc in the first st, 2sc in the next st, rep to end (9sc)
Rounds 2 - 3: (2 rounds) sc in each st (9sc)
Round 4: sc in the first st, sc2tog, rep to end (6sc)
Round 5: sc in each st
Fasten off black yarn and fasten on grey yarn.
Rounds 6 - 9: (4 rounds) sc in each st (6sc)
Fasten off
For the legs (make 2):
With beige make a magic loop with 6sc
Round 1: 2sc in each st (12sc)
Round 2: sc in the first 3 sts, 2cs in the next st, rep to end (15sc)
Rounds 3- 4: (2 rounds) sc in each st (15sc)
Round 5: sc2tog 3 times, sc in the last 9 sts (12sc)
Round 6: sc in the first 2 sts, sc2tog, rep to end (9sc)
Fasten off. Fasten on in grey yarn
Rounds 7 - 11: (5 rounds) sc in each st (9sc)
Rounds 3- 4: (2 rounds) sc in each st (15sc)
Round 5: sc2tog 3 times, sc in the last 9 sts (12sc)
Round 6: sc in the first 2 sts, sc2tog, rep to end (9sc)
Fasten off. Fasten on in grey yarn
Rounds 7 - 11: (5 rounds) sc in each st (9sc)
Fasten off
Stuff the legs and sew them to the underside of the body
Stuff the legs and sew them to the underside of the body
For the head:
With tan yarn make a magic loop with 6sc
Round 1: (make 3sc in the first st, sc2) twice (10sc)
Round 2: sc, make 3sc in the next st, hdc5, make 3sc in the next st, sc2 (14sts)
Round 3: slip3, make 2sc in the next st, hdc5, make 2sc in the next st, slip4 (16sts)
Round 4: slip4, make 2sc in the next st, hdc5, make 2sc in the next st, sc5 (18sts)
Round 5: sc5, make 2sc in the next st, hdc5, make 2sc in the next st,sc6 (20sts)
Round 6 - 10: (5 rounds) sc in each st
Round 11: sc2, sc2tog 3 times, sc3, sc2tog 3 times, sc3 (14sts)
Round 12: sc2tog 3 times, sc, sc2tog 3 times, sc (8sc)
Stuff firmly
Round 13: sc2tog 3 times (5sc)
Fasten off
For the nose:
with tan yarn make a magic loop with 1sc. ch1, turn
Row 1: make 2sc in this st. ch1, turn
Row 2: make 2sc in each of these 2sts
Fasten off
Sew this to the face, as shown below

For the ears (make 2):
with tan yarn ch3
Row 1: make 3sc in the 2nd chain st from hook, then make 3sc in the first chain st you made (6sc)
Fasten off
Sew these to the sides of the head

For the hair:
Embroider the hair onto the head using black yarn. You may want to use the following images as a reference (original images).


I started from the front of the head, and tried to get the general shape of the hairline before working backwards to cover the rest of the head. I also layered up the embroidery at the front to try to get the height of the hair.


For the eyes:
Make repeated sts around the eye sockets to try to pull them back into the head.
After this you will need to embroider the whites of the eyes, before using brown embroidery thread to sew the irises over the top. You will then need to add the pupil in the centre using black embroidery thread


For the remaining facial features:
You next need to sew the moustache and eyebrows in place using the black yarn. You will also need to add the mouth using black embroidery thread. Once you've done this you should sew the head to the body.


with a 2mm hook and white 4ply yarn ch30
Round 1: sc in the first chain st,then sc in each of the next 29 chain sts to make a loop (30sc)
Round 2: (sc13, sc2tog) twice
Rounds 3 - 8: (6 rounds) sc in each st
Round 9: ch7, skip14, sc14
Round 10: sc in each of these 7 chain sts, then sc in the 14sts you made on the previous round (21sc)
Round 11: sc in each of these 21sts
Round 12: sc3, sc2tog, sc8, sc2tog, sc6 (19sc)
Round 13: sc in each st
Round 14: sc3, sc2tog, sc14
Rounds 15 - 16: (2 rounds) sc in each st
Fasten off neatly
Rejoin yarn to round 8 to the st after the last one you crocheted in (see below)
Round 9: Sc in this st and the next 13sts, ch7
Round 10: sc in the last 14sts you made, then in the 7 chain sts (21ssc)
Round 11: sc in each of these 21sts
Round 12: sc6, sc2tog, sc9, sc2tog, sc2
Round 13: sc in each st
Round 14: sc16, sc2tog, sc
Rounds 15 - 16: (2 rounds) sc in each st
Fasten off neatly
For the belt:
With a 2mm hook and white 4ply yarn ch3
Row 1: sc in the 2nd loop from hook, sc in the next chain st, turn
Row 2: slip2. ch1, turn
Row 3: sc in both of the sts underneath the slip sts in turn (essentially you are crocheting as you would if the slip sts weren't there)
repeat these last 2 rows 26 times, or until the belt fits snugly around the waist
For the buckle:
wind a section of the craft wire into a circle with a diameter slightly larger than the width of the belt. Shape this into a square, as shown in the 2nd photo, and wind the loose end around the other section of wire so that this sharp end isn't sticking out.


Wind the longer end of the wire around the buckle to achieve the shape shown below, with the buckle split into two via a central length of wire.


Tie a length of embroidery thread to the centre of the buckle, then wind it around the edges to hide the wire, as shown below


Once this is done thread the buckle onto the belt.


After this you will need to use the grey embroidery thread to embroider a series of dots onto the belt either side of the buckle to look like the holes the the buckle goes through, as shown below.
 |
For the belt loops (make 4):
ch5, fasten off
Sew these to the waistline of the trousers, making sure that the belt can fit through them
Slide the belt through the belt loops , then sew the ends together at the back.


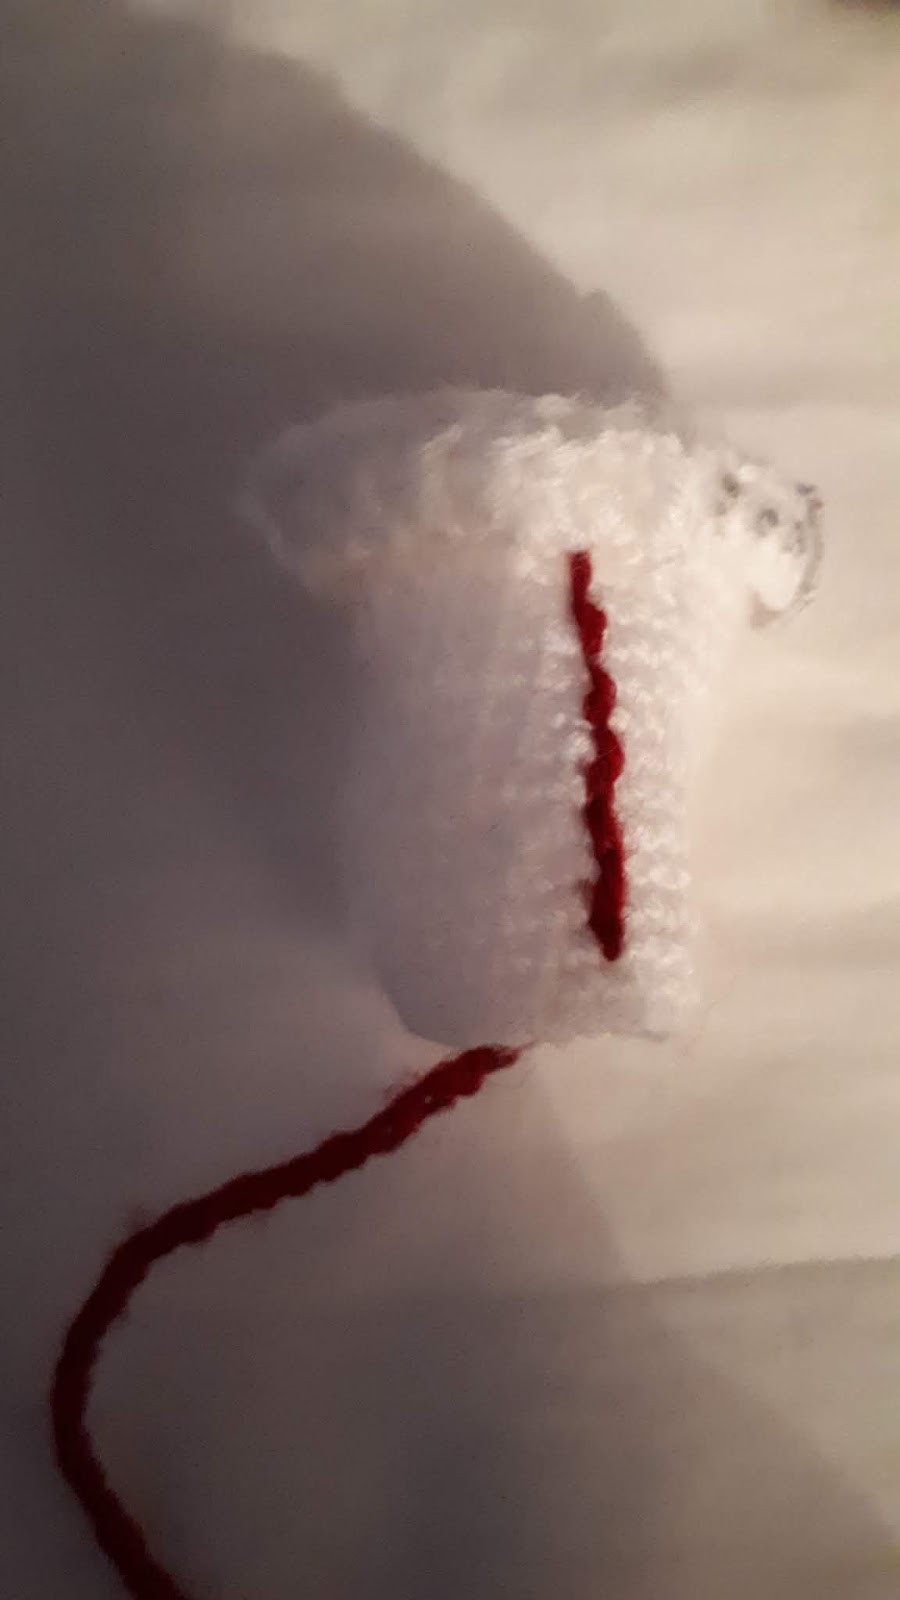
Next you should use red yarn to embroider vertical stripes onto the sides of the trousers, as shown in the photos below.

For the shirt:
With a 2mm hook and white 4ply yarn ch28
Round 1: sc in the first chain st,then sc in each of the next 27 chain sts to make a loop (28sc)
Rounds 2 - 7: (6 rounds) sc in each st
Row 8: sc in each st. ch1, turn
Row 9: bfsc7, bfsc2tog. ch1, turn
Row 10: sc6, sc2tog. ch1, turn
Row 11: bfsc4, bfsc3tog. ch1, turn
Row 12: sc2tog, sc, sc2tog. ch1, turn
Row 13: bfsc2tog, bfsc. ch1, turn
Row 14: sc, hdc. ch1, turn
bfsc2
Fasten off
Rejoin yarn to the same st as the last st you crocheted into at the end of row 8 (as shown below)

Row 9: Sc in this st and the next 8sts. ch1, turn
Row 10: bfsc2tog, bfsc7. ch1, turn
Row 11: sc2tog, sc6. ch1, turn
Row 12: bfsc3tog, bfsc4. ch1, turn
Row 13: sc2tog, sc, sc2tog. ch1,turn
Row 14: bfsc, bfsc2tog. ch1, turn
Row 15: hdc, sc. ch1, turn
bfsc2
Fasten off
Rejoin yarn to the next st after the last st you crocheted into on row 8

Row 9: sc2tog between this st and the next one, sc7, sc2tog. ch1, turn
Row 10: hdc9. ch1, turn
Row 11: sc9. ch1, turn
Row 12: hdc9. ch1, turn
Row 13: sc9. ch1, turn
Row 14: hdc9. ch1, turn
Row 15: sc9. turn
slip1, bfsc, ch1, slip5, ch1, bfsc, slip1
Fasten off
Place the shirt onto Freddie, then use black yarn to embroider the chest hair (as shown below).


For the shoes:
with white ch5
Round 1: sc in the 2nd st from hook and the next 2 chain sts. Make 3sc in the first chain st you made, then sc in the back loop of the previous 2 chain sts you crocheted into. Make 2sc in the back loop of the first chain st you crocheted into. (10sc)
Round 2: sc, make 2sc in the next st, sc2, (sc, make 2sc in the next st) 3 times, sc2, (sc, make 2sc in the next st) twice
Rounds 3 - 5: (3 rounds) sc in each st
Row 6: sc6, sc in the outer 2 loops only of the next 2sts. ch1, turn
Row 7: bfsc2tog, bfsc15, bfsc in the outer loop only of the next 2sts. ch, turn (18sts)
Row 8: sc2tog, sc6, sc2tog twice, sc3, sc3tog. ch1, turn (13sts)
Row 9: bfsc10, bfsc3tog. ch1, turn (10sts)
Row 10: sc5
Fasten off neatly
Join yarn to the inner loop of the first st of round 5 you crocheted only in the outer loop of (as shown below)

Row 6: Sc in this st and the inner loop of the next st, sc in both loops of the next 3sts, then sc in the inner loops only of the next 2sts. ch1, turn
Row 7: bfsc7
Fasten off
Embroider the black stripes onto both sides of the shoes using black embroidery thread

Lace up the shoes using white crochet cotton. Tie up the laces, snip the ends, then add a dab of PVA glue to the raw ends to stop them fraying.


For the jacket:
(Use a 1mm hook and yellow crochet cotton for all parts of the jacket)
ch41
Round 1: sc in the 2nd chain st from hook, then sc in each of the following chain sts. ch1, turn (40sts)
Round 2 - 13: (12 rounds) sc in each st. ch1, turn
Row 14: sc6, sc2tog. ch1, turn (7sc)
Rows 15 - 16: (2 rows) sc in each of these 7 sts. ch1, turn
Row 17: make 2sc in the first st, sc6. ch1, turn (8sc)
Row 18: sc3, make 2sc in the next st, sc4, ch1 turn (9sc)
Row 19: slip2, sc, hdc2, ch1, sc4
Fasten off
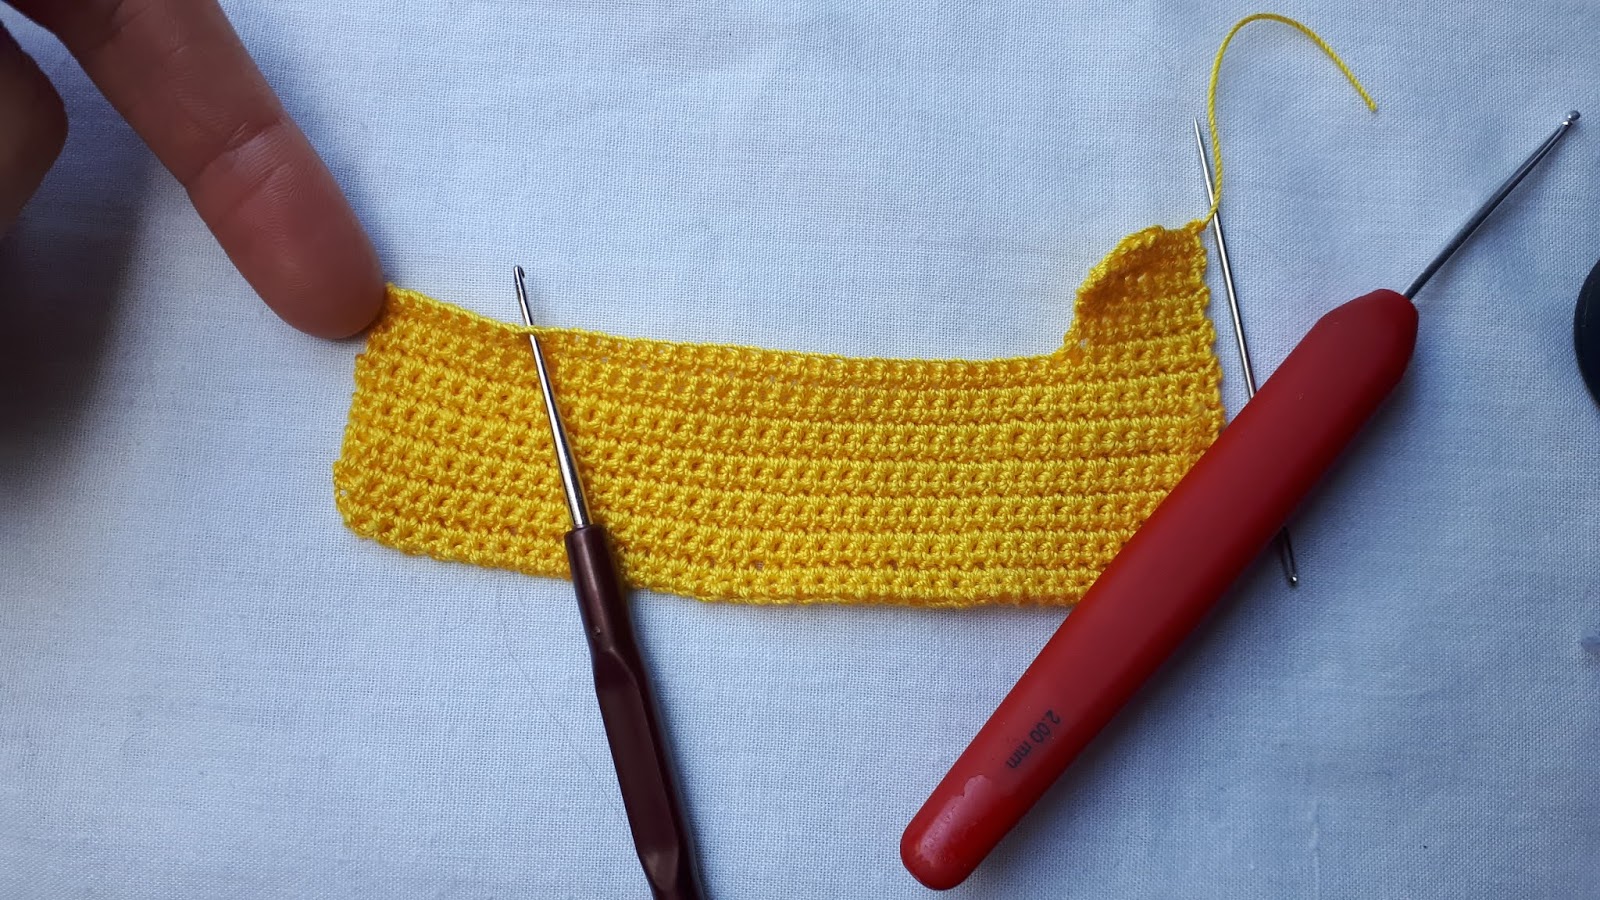
Rejoin yarn to the 8th st from the end of row 13 (as shown below)
Row 14: sc2tog between this st and the next, sc6. ch1, turn (7sc)
Rows 15 - 16: (2 rows) sc in each of these 7 sts. ch1, turn
Row 17: sc6, make 2sc in each st. ch1, turn (8sc)
Row 18: sc4, make 2sc in the next st, sc3.ch1,turn (9sc)
Row 19: sc4, ch1, hdc2, sc, slip2
Fasten off
Rejoin yarn to row 13 to the 3rd st after the last st you crocheted into on the first front panel you made (as shown below)

Row 13: sc2tog between this st and the next one, sc18, sc2tog. ch1, turn (20sc)
Row 14: sc2tog, sc16, sc2tog. ch1, turn (18sc)
Row 15: sc2tog, sc5, sc2tog twice, sc5, sc2tog (14sc)
Row 16: sc2tog, sc4, sc2tog, sc4, sc2tog (11sc)
Row 17: make 2sc in the first st, sc9, make 2sc in the last st (13sc)
Row 18: make 2sc in the first st, sc11, make 2sc in the last st (15sc)
Row 19: make 2sc in the first st, sc2, hdc2, ch1, sc5, ch1, hdc2, sc2, make 2sc in the last st (19sts (including chain sts))
Row 20: slip3, sc, hdc2, ch1, sc in the chain st, sc5, sc in the chain st, ch1, hdc2, sc, slip3
Fasten off
Rejoin yarn to the end of the final row of the 2nd section you made

Row 21: (sc in the back loop only of each of these sts) sc in this st, then sc in each of the next 3sts. Skip the remaining sts on this section, then sc into the 8th st of the next section across (as shown in the 1st image below). Sc in the next 6sts, then skip the remaining st of this section and sc in the 7th st on on the next section (as shown in the 2nd image below). Sc in the next 3sts. ch1, turn (15sc)


Row 22: sc in each of these sts
Fasten off
Sew the shoulder seams together

For the sleeves (make 2):
ch17
Round 1: sc in the first chain st you made, then sc in each of the following 16 chain sts to make a loop (17sc)
Rounds 2 - 7: (6 rounds) sc in each st
Round 8: sc in each st. ch1, turn
Round 9: bfsc2tog, bfsc5, bfsc2tog, bfsc5, bfsc2tog (13sc)
Round 10: sc2tog, sc4, sc2tog, sc3, sc2tog (10sc)
Round 11: bfsc2tog, bfsc6, bfsc2tog (8sc)
Round 12: sc2tog 4 times (4sc)
Fasten off
Sew these to the armholes of the jacket.
ch18
Round 1: sc in the first chain st you made, then sc in each of the following 16 chain sts to make a loop (17sc)
Fasten off neatly
Rejoin yarn to the back loop of one of these chain sts

Round 2: Sc in the back loop of this st and each of the next 17 chain sts
Fasten off neatly
Sew these to the ends of the sleeves, then use silvery-grey embroidery thread to embroider around both 'cast off' edges of the cuffs, as can be seen below.


For the straps (make 5 of each):
ch2
Row 1: sc in the 2nd chain st from hook. ch1, turn
Rows 2 - 4: (3 rows) sc in this st. ch1, turn
Row 5: sc in this st
Fasten off
ch2
Row 1: sc in the 2nd chain st from hook. ch1, turn
Rows 2 - 5: (4 rows) sc in this st. ch1, turn
Row 6: sc in this st
Fasten off
Sew the longer straps to the right-hand side of the jacket so that they overhang slightly, and sew the shorter straps to the left-hand side.


Embroider around the outside of each of the straps using 2 strands of silvery-grey embroidery thread, as shown below.


For the buckles (make 7):
wind the wire into a square of sides 4mm long (using your pliers), then extend the longer end by 4mm, bend it 90 degrees, then make another 90 degree bend 4mm from the previous one, so that you get a 4x8mm rectangle with a piece of wire dividing it, as shown below

Bend the longer end of wire down so that its parallel with the section of wire dividing up the rectangle (as shown below)

Bend the wire back on itself, as shown below

Cut the end of the wire using wire cutters, then sew the ends of the straps on the left-hand side of the jacket to the centre of the buckles, as shown below


ch3
Row 1: sc in the 2nd loop from hook, sc in the next chain st. ch1, turn
Rows 2 - 6: (5 rows) sc in both of these sts. ch1, turn
Row 7: sc in both of these sts
Fasten off
Thread theses straps through the 2 remaining buckles, then sew them to the shoulders of the jacket.


That's all for the pattern! I hope you have enjoyed it and if you have any questions about this or any of my other patterns please don't hesitate to contact me, either by leaving a comment below, or via my Ravelry or Instagram pages.
You are very welcome to sell finished products, but I do ask that you don't re-post this pattern or claim it as your own. Thank you!


No comments:
Post a Comment