This outfit is made to fit any of my little animals (a full list can be found here)

Difficulty:

easy - medium
You will need:
- A little animal (the bear it is modeled on above can be found here)
- 4ply yarn in white, black and purple
- 2mm crochet hook
- A pipecleaner
- glue (optional)
- white sewing cotton
- A darning needle or similar for sewing up.
For the shorts:
ch25
Round 1: sc in the first chain st you made, then sc in every other stitch around. This should form a loop (25sc)
Round 2: sc in each st
Row 3: sc in the first st. ch1, turn, sc in the following 22sts
Row 4: ch1, turn. sc in each of the first 22sts (22sc)
Round 5: ch4, sc in the stitch across from the gap (the first stitch you crocheted in the previous row, sc in the next 21 sts (26sts)
Round 6: sc in each of the next 4 chain sts and following 22 sts (26sc)
Rounds 7 - 8: (2 rounds) sc in each st (26sc)
Round 9: sc in the first st, ch3, skip13 from base of chain, sc in each of the next 12sts. These last 16 sts form a new round (16sts)
Rounds 10 - 11: (2 rounds) sc in each of these last 16sts you crocheted (16sc)
Fasten off
Rejoin yarn to round 8 in the stitch after the stitch before you made the chain 3 (hopefully the diagram below will clear things up if you're confused about where I'm talking about). Sc in this st and the next 12 sts. ch3, then make a slip stitch in the first stitch of this round (where you fastened on)
Round 10: sc in this st, the next 12 sts and the following 3 chain sts. This forms a new round (16sc)
Round 11: sc in each of the next 16 sts (16sc)
Fasten off
 |
| The blackish stitches show where you have already crocheted (to form the other leg of the shorts) You should attach the yarn to the turquoise stitch. |
For the shirt:
ch25
ch25
Round 1: sc in the first chain stitch you made and every following chain st to make a loop.
Rounds 2 - 4: (3 rounds) sc in each st (25sc)
Round 5: sc2tog, sc in the next 10sts, sc2tog, sc in the last 11sts (23sc)
Round 6: sc in each st (23sc)
Round 7: ch1, turn. sc in the first 5sts, sc2tog, sc in the next 9sts, sc2tog, sc in the last 5sts (21sc)
Round 8: ch1, turn. sc in each st (21sc)
Round 9: ch1, turn. sc in the first 2sts, ch4, skip 4 from base of chain, sc in the next 2sts, slip the following 3sts, sc in the next 2sts, ch4, skip 4 from base of chain, sc in the last 3sts.
Fasten off
For the sleeves:
ch16
Round 1: sc in the first st, sc to end
Row 3: sc in the first 6 sts, sc2tog, rep to end. ch1, turn (14sc)
Row 4: sc in the first 7 sts. ch1, turn (7sc)
Row 5: sc in the first 7 sts
Round 6: slip 16sts around the edge of the sleeve (one in each st and 1 in between the rows each time the stitching jumps up 2 rows because of where you did the sc7)
Fasten off
Sew the sleeves onto the top and make a buttonhole with the yarn at the back. Sew a button on opposite.
For the shoes:
With white 4ply yarn make a magic loop with 6sc
Round 1: sc in each st (12sc)
Round 2: sc in the first 3 sts, 2sc in the next st, rep 3 times to end (15sc)
Fasten off neatly
Fasten on with purple 4ply yarn
Round 3: sc in the back loop of each st (15sc)
Round 4: sc in both loops of each st
Round 5: sc in the first 3sts , sc2tog, rep 3 times to end (12sc)
Round 6: (this is slightly more than 1 round) sc2tog 3 times, slip the next 2sts, ch1, hdc in the next 3sts, ch1, slip the following 2sts (9sc)
Fasten off
Thread white 4ply yarn through the front of the boots to look like laces and tie them in a bow.
For the racket:
Take the pipe cleaner and bend the end over into a loop and wind it around the lower part of the pipe-cleaner. Add a dab of glue if you need it to be particularly sucure and are worried about it falling apart.


 Cut off a small section of pipe cleaner and attach this to the bottom section of the loop. Wind the ends around and add some glue if necessary.

Next fold over a small bit the bottom section of the pipe cleaner and trim it to a suitable length.

Then tie a length of white 4ply yarn to this end section. Wind the yarn around the end of the handle, then start moving up until the section you want to have the handle on is completely covered. When you are satisfied sew the end of the yarn in. You may want to add a little glue to the end of the handle to secure the yarn in place, or you can just sew it into position with the end of the yarn
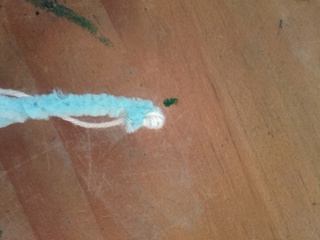


After this you need to make the 'strings' on the racket. Tie a length of white sewing cotton to the base section of the racket (shown in the picture below), then wind it around the frame vertically. When you get to the end thread the cotton underneath the other strings and continue on the other side of where you started (again shown below)


After this you need to make the horizontal strings. Do as you did for the vertical strings, weave the thread through the horizontal strings, going over the first one, under the second one, etc. repeat this on the back of the racket, and then again on the front, but this time go under the first string and over the second one. Repeat this until you reach the top of the racket.


You may want to add a little glue to the edges of the strings on the rackets to keep them in place, but I usually find that this isn't necessary as they usually stay in place.

I hope you have enjoyed this pattern. There should be more coming in the near future and you can keep in touch with my progress on my new Instagram account (found here). You are very welcome to sell finished products but I do ask that you don't re-post any patterns or claim them as your own. Thank you!
No comments:
Post a Comment